Best 21 HTML CSS JavaScript projects with source code

I’ve heard you’re starting with web development projects. It’s a great idea, but when you’re working alone, finding a significant project might be challenging. Therefore, this article presents 21 projects using HTML, CSS, and JavaScript with source code. Here, projects are listed from beginners to experts who are great at practising projects using HTML, CSS, and JavaScript with source code.
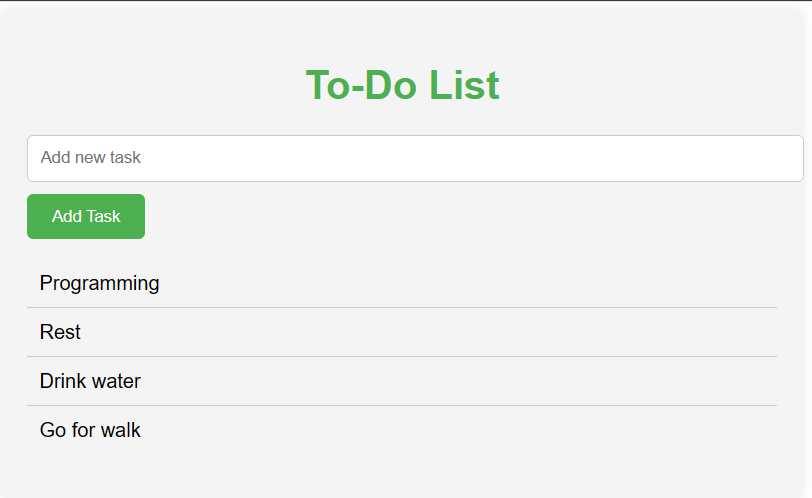
1. To-Do List App
Are you ready to go into the dynamic world of web development? This to-do list app is perfect for you as a beginner. Crafted with HTML for structure, CSS for style, and JavaScript for interactivity, this project will teach you the foundations of creating a responsive and user-friendly application.
To do list app source code
				<!DOCTYPE html>
<html lang="en">
<head>
<meta charset="UTF-8">
<meta name="viewport" content="width=device-width, initial-scale=1.0">
<title>To-Do List</title>
<style>
    body {
  font-family: Arial, sans-serif;
}

.container {
  max-width: 600px;
  margin: 0 auto;
  padding: 20px;
  background-color: #f4f4f4;
  border-radius: 5px;
  box-shadow: 0px 0px 10px rgba(0,0,0,0.1);
}

h1 {
  text-align: center;
  color: #4CAF50;
}

input[type="text"] {
  width: 100%;
  padding: 10px;
  margin-bottom: 10px;
  border: 1px solid #ccc;
  border-radius: 5px;
}

button {
  padding: 10px 20px;
  background-color: #4CAF50;
  color: white;
  border: none;
  border-radius: 5px;
  cursor: pointer;
  transition: background-color 0.3s ease;
}

button:hover {
  background-color: #45a049;
}

ul {
  list-style-type: none;
  padding: 0;
}

li {
  padding: 10px;
  border-bottom: 1px solid #ccc;
}

li:last-child {
  border-bottom: none;
}

</style>
<script>
    function addTask() {
  var taskInput = document.getElementById("taskInput");
  var taskList = document.getElementById("taskList");

  if (taskInput.value === "") {
    alert("Please enter a task.");
    return;
  }

  var li = document.createElement("li");
  li.textContent = taskInput.value;
  taskList.appendChild(li);

  taskInput.value = "";
}

</script>
</head>
<body>
<div class="container">
  <h1>To-Do List</h1>
  <input type="text" id="taskInput" placeholder="Add new task">
  <button onclick="addTask()">Add Task</button>
  <ul id="taskList"></ul>
</div>

</body>
</html>
Output
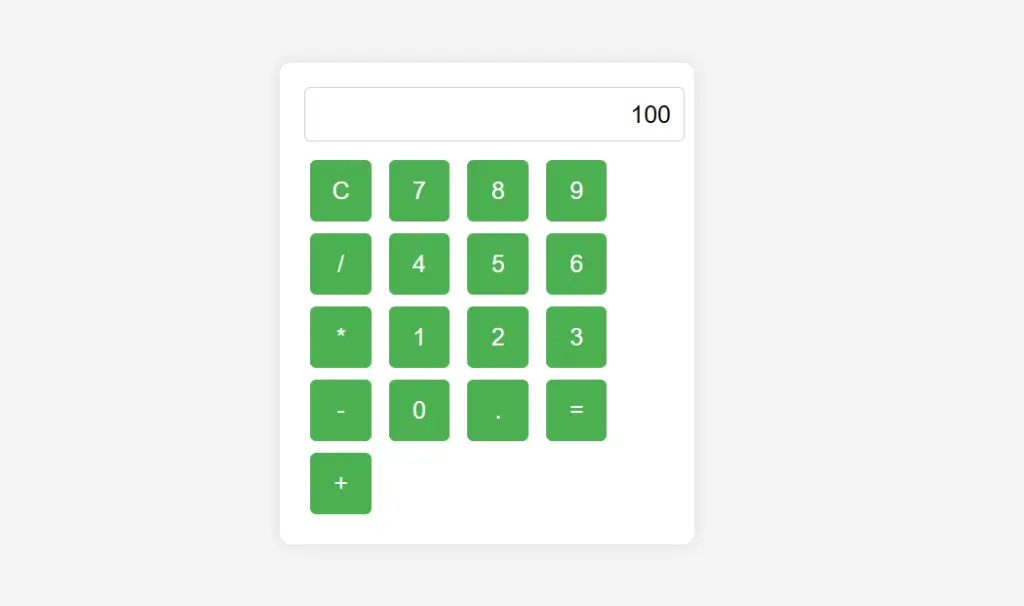
2. Calculator
Build a calculator using HTML for the UI, CSS for styling, and JavaScript to handle user inputs and perform calculations. This beginner-level project is both practical and visually rewarding.
Calculator source code
				<!DOCTYPE html>
<html lang="en">
<head>
<meta charset="UTF-8">
<meta name="viewport" content="width=device-width, initial-scale=1.0">
<title>Calculator</title>
<style>
    body {
  font-family: Arial, sans-serif;
  background-color: #f4f4f4;
  display: flex;
  justify-content: center;
  align-items: center;
  height: 100vh;
}

.calculator {
  width: 300px;
  background-color: #fff;
  border-radius: 10px;
  padding: 20px;
  box-shadow: 0 0 10px rgba(0,0,0,0.1);
}

input[type="button"] {
  width: 50px;
  height: 50px;
  font-size: 20px;
  margin: 5px;
  border: none;
  border-radius: 5px;
  background-color: #4CAF50;
  color: white;
  cursor: pointer;
  transition: background-color 0.3s ease;
}

input[type="button"]:hover {
  background-color: #45a049;
}

input[type="text"] {
  width: calc(100% - 10px);
  padding: 10px;
  margin-bottom: 10px;
  border: 1px solid #ccc;
  border-radius: 5px;
  font-size: 20px;
  text-align: right;
}
</style>
<script>
    function calculate() {
  var input = document.getElementById("input").value;
  var result = eval(input);
  document.getElementById("input").value = result;
}

function clearInput() {
  document.getElementById("input").value = "";
}
</script>
</head>
<body>
<div class="calculator">
  <input type="text" id="input" readonly>
  <input type="button" value="C" onclick="clearInput()">
  <input type="button" value="7" onclick="document.getElementById('input').value += '7'">
  <input type="button" value="8" onclick="document.getElementById('input').value += '8'">
  <input type="button" value="9" onclick="document.getElementById('input').value += '9'">
  <input type="button" value="/" onclick="document.getElementById('input').value += '/'">
  <input type="button" value="4" onclick="document.getElementById('input').value += '4'">
  <input type="button" value="5" onclick="document.getElementById('input').value += '5'">
  <input type="button" value="6" onclick="document.getElementById('input').value += '6'">
  <input type="button" value="*" onclick="document.getElementById('input').value += '*'">
  <input type="button" value="1" onclick="document.getElementById('input').value += '1'">
  <input type="button" value="2" onclick="document.getElementById('input').value += '2'">
  <input type="button" value="3" onclick="document.getElementById('input').value += '3'">
  <input type="button" value="-" onclick="document.getElementById('input').value += '-'">
  <input type="button" value="0" onclick="document.getElementById('input').value += '0'">
  <input type="button" value="." onclick="document.getElementById('input').value += '.'">
  <input type="button" value="=" onclick="calculate()">
  <input type="button" value="+" onclick="document.getElementById('input').value += '+'">
</div>
</body>
</html>
Output
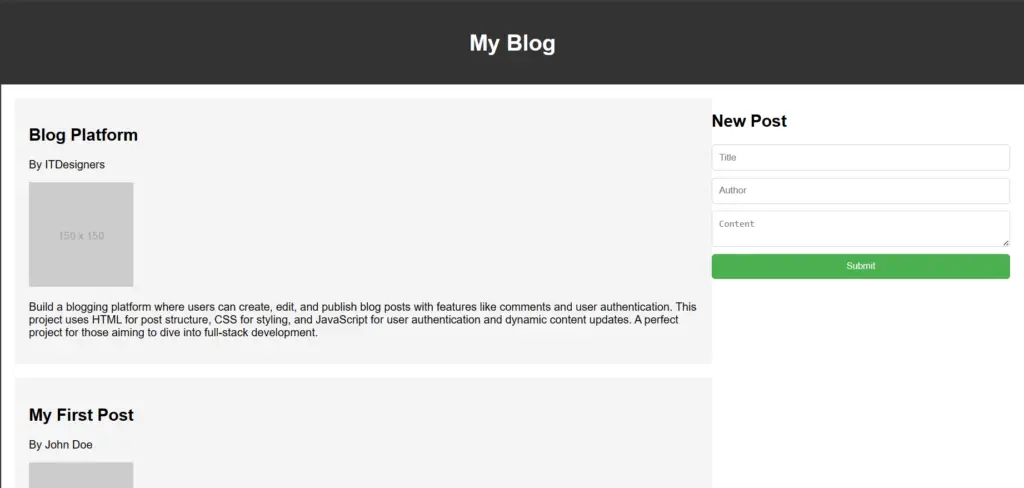
3. Blogging Website
Build a blogging platform where users can create, edit, and publish blog posts with features like comments and user authentication. This project uses HTML for post structure, CSS for styling, and JavaScript for user authentication and dynamic content updates. A perfect project for those aiming to dive into full-stack development.
Calculator source code
				<!DOCTYPE html>
<html lang="en">
<head>
<meta charset="UTF-8">
<meta name="viewport" content="width=device-width, initial-scale=1.0">
<title>Blog Platform</title>

</head>
<style>
    body {
  font-family: Arial, sans-serif;
  margin: 0;
  padding: 0;
}

header {
  background-color: #333;
  color: white;
  padding: 20px;
  text-align: center;
}

main {
  display: flex;
  justify-content: space-between;
  padding: 20px;
}

#blog-posts {
  flex: 1;
}

#new-post {
  width: 30%;
}

.blog-post {
  margin-bottom: 20px;
  padding: 20px;
  background-color: #f4f4f4;
}

.blog-post img {
  max-width: 100%;
}

#post-form {
  display: flex;
  flex-direction: column;
}

#post-form input,
#post-form textarea {
  margin-bottom: 10px;
  padding: 10px;
  border: 1px solid #ccc;
  border-radius: 5px;
}

#post-form input[type="submit"] {
  background-color: #4CAF50;
  color: white;
  border: none;
  border-radius: 5px;
  cursor: pointer;
}

#post-form input[type="submit"]:hover {
  background-color: #45a049;
}

</style>
<body>
<header>
  <h1>My Blog</h1>
</header>
<main>
  <section id="blog-posts">
    <!-- Blog posts will be dynamically added here -->
  </section>
  <section id="new-post">
    <h2>New Post</h2>
    <form id="post-form">
      <input type="text" id="title" placeholder="Title" required>
      <input type="text" id="author" placeholder="Author" required>
      <textarea id="content" placeholder="Content" required></textarea>
      <input type="submit" value="Submit">
    </form>
  </section>
</main>
<script>

document.addEventListener("DOMContentLoaded", function() {
  const blogPosts = [
    {
      title: "My First Post",
      author: "John Doe",
      content: "This is my first blog post. It's amazing!",
      image: "https://via.placeholder.com/150"
    },
    {
      title: "My Second Post",
      author: "Jane Smith",
      content: "This is my second blog post. It's even better!",
      image: "https://via.placeholder.com/150"
    }
  ];

  const blogPostsSection = document.getElementById("blog-posts");

  blogPosts.forEach(post => {
    const postElement = document.createElement("article");
    postElement.classList.add("blog-post");
    postElement.innerHTML = `
      <h2>${post.title}</h2>
      <p>By ${post.author}</p>
      <img src="${post.image}" alt="${post.title}">
      <p>${post.content}</p>
    `;
    blogPostsSection.appendChild(postElement);
  });

  const postForm = document.getElementById("post-form");
  postForm.addEventListener("submit", function(event) {
    event.preventDefault();
    const title = document.getElementById("title").value;
    const author = document.getElementById("author").value;
    const content = document.getElementById("content").value;
    const image = "https://via.placeholder.com/150"; // Placeholder image
    const newPost = {
      title,
      author,
      content,
      image
    };
    blogPosts.push(newPost);
    const postElement = document.createElement("article");
    postElement.classList.add("blog-post");
    postElement.innerHTML = `
      <h2>${newPost.title}</h2>
      <p>By ${newPost.author}</p>
      <img src="${newPost.image}" alt="${newPost.title}">
      <p>${newPost.content}</p>
    `;
    blogPostsSection.insertBefore(postElement, blogPostsSection.firstChild);
    postForm.reset();
  });
});

</script>
</body>
</html>
Output
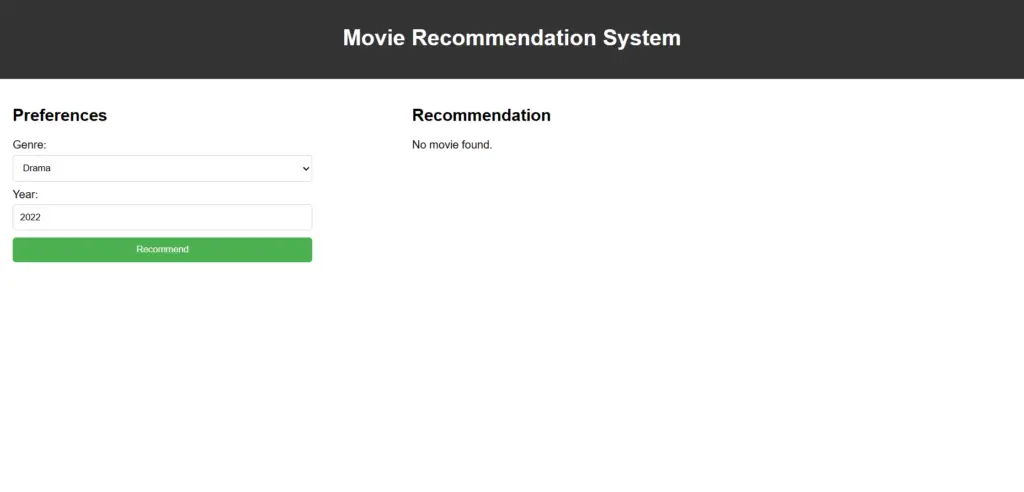
Movie Recommendation System
The Movie Recommendation System enhances the entertainment experience by providing personalized movie recommendations for users. Users interact with the website to discover new films that align with their tastes and preferences. The system is designed to provide movie recommendations based on user preferences and viewing history.
Movie recommendation system source code
				<!DOCTYPE html>
<html lang="en">
<head>
<meta charset="UTF-8">
<meta name="viewport" content="width=device-width, initial-scale=1.0">
<title>Movie Recommendation System</title>

</head>
<style>
    body {
  font-family: Arial, sans-serif;
  margin: 0;
  padding: 0;
}

header {
  background-color: #333;
  color: white;
  padding: 20px;
  text-align: center;
}

main {
  display: flex;
  justify-content: space-between;
  padding: 20px;
}

#preferences {
  width: 30%;
}

#recommendation {
  width: 60%;
}

#preference-form {
  display: flex;
  flex-direction: column;
}

#preference-form label {
  margin-bottom: 5px;
}

#preference-form select,
#preference-form input[type="number"],
#preference-form input[type="submit"] {
  margin-bottom: 10px;
  padding: 10px;
  border: 1px solid #ccc;
  border-radius: 5px;
}

#preference-form input[type="submit"] {
  background-color: #4CAF50;
  color: white;
  border: none;
  border-radius: 5px;
  cursor: pointer;
}

#preference-form input[type="submit"]:hover {
  background-color: #45a049;
}

</style>
<body>
<header>
  <h1>Movie Recommendation System</h1>
</header>
<main>
  <section id="preferences">
    <h2>Preferences</h2>
    <form id="preference-form">
      <label for="genre">Genre:</label>
      <select id="genre">
        <option value="action">Action</option>
        <option value="comedy">Comedy</option>
        <option value="drama">Drama</option>
        <option value="horror">Horror</option>
        <option value="romance">Romance</option>
      </select>
      <label for="year">Year:</label>
      <input type="number" id="year" min="1900" max="2022" value="2022">
      <input type="submit" value="Recommend">
    </form>
  </section>
  <section id="recommendation">
    <h2>Recommendation</h2>
    <p id="movie-recommendation">No recommendation yet.</p>
  </section>
</main>
<script>
document.addEventListener("DOMContentLoaded", function() {
  const preferencesForm = document.getElementById("preference-form");
  const movieRecommendation = document.getElementById("movie-recommendation");

  preferencesForm.addEventListener("submit", function(event) {
    event.preventDefault();
    const genre = document.getElementById("genre").value;
    const year = document.getElementById("year").value;
    const recommendation = recommendMovie(genre, year);
    movieRecommendation.textContent = recommendation;
  });

  function recommendMovie(genre, year) {
    // This is a placeholder function. In a real system, you would use more complex algorithms and data.
    const movies = [
      { title: "Movie 1", genre: "action", year: 2020 },
      { title: "Movie 2", genre: "comedy", year: 2019 },
      { title: "Movie 3", genre: "drama", year: 2018 },
      { title: "Movie 4", genre: "horror", year: 2017 },
      { title: "Movie 5", genre: "romance", year: 2016 }
    ];

    const filteredMovies = movies.filter(movie => movie.genre === genre && movie.year >= year);
    if (filteredMovies.length > 0) {
      const randomIndex = Math.floor(Math.random() * filteredMovies.length);
      return filteredMovies[randomIndex].title;
    } else {
      return "No movie found.";
    }
  }
});


</script>
</body>
</html>
Output
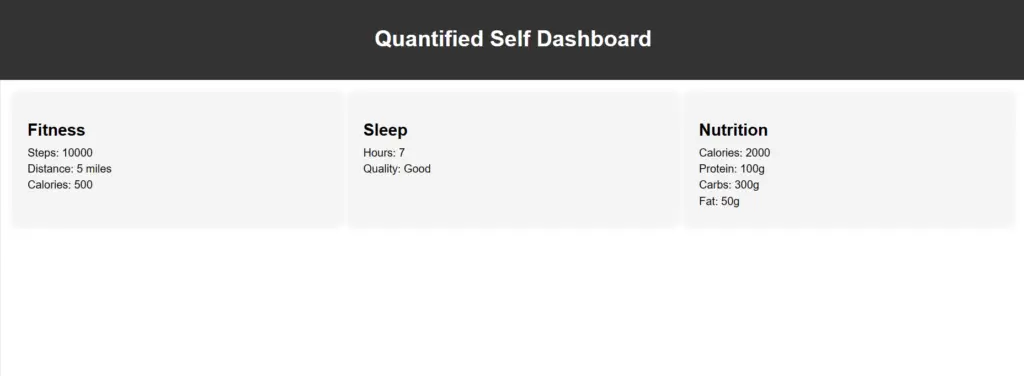
5. Quantified Self Dashboard
The Quantified Self Dashboard is a user-friendly website that uses HTML, CSS, and JavaScript to create a custom platform for tracking and visualizing various aspects of life, such as fitness, health, and habits. Users can input their data and get visual representations and insights to better understand their daily activities and behaviours. The dashboard helps users keep track of exercise, monitor sleep, and journal food intake. It provides personalized suggestions based on user data to make smart lifestyle choices. Users can view progress, set goals, and get insights through the web interface.
Quantified Self Dashboard source code
				<!DOCTYPE html>
<html lang="en">
<head>
<meta charset="UTF-8">
<meta name="viewport" content="width=device-width, initial-scale=1.0">
<title>Quantified Self Dashboard</title>
<style>
    body {
  font-family: Arial, sans-serif;
  margin: 0;
  padding: 0;
}

header {
  background-color: #333;
  color: white;
  padding: 20px;
  text-align: center;
}

main {
  display: flex;
  justify-content: space-between;
  padding: 20px;
}

section {
  width: 30%;
  padding: 20px;
  background-color: #f4f4f4;
  border-radius: 5px;
  box-shadow: 0 0 10px rgba(0,0,0,0.1);
}

section h2 {
  margin-bottom: 10px;
}

section p {
  margin: 5px 0;
}
</style>
<script>
    document.addEventListener("DOMContentLoaded", function() {
  // This is a placeholder function. In a real system, you would fetch and display data from various sources.
  const fitnessData = {
    steps: 10000,
    distance: 5,
    calories: 500
  };

  const sleepData = {
    hours: 7,
    quality: "Good"
  };

  const nutritionData = {
    calories: 2000,
    protein: 100,
    carbs: 300,
    fat: 50
  };

  const fitnessDataDiv = document.getElementById("fitness-data");
  const sleepDataDiv = document.getElementById("sleep-data");
  const nutritionDataDiv = document.getElementById("nutrition-data");

  fitnessDataDiv.innerHTML = `
    <p>Steps: ${fitnessData.steps}</p>
    <p>Distance: ${fitnessData.distance} miles</p>
    <p>Calories: ${fitnessData.calories}</p>
  `;

  sleepDataDiv.innerHTML = `
    <p>Hours: ${sleepData.hours}</p>
    <p>Quality: ${sleepData.quality}</p>
  `;

  nutritionDataDiv.innerHTML = `
    <p>Calories: ${nutritionData.calories}</p>
    <p>Protein: ${nutritionData.protein}g</p>
    <p>Carbs: ${nutritionData.carbs}g</p>
    <p>Fat: ${nutritionData.fat}g</p>
  `;
});
</script>
</head>
<body>
<header>
  <h1>Quantified Self Dashboard</h1>
</header>
<main>
  <section id="fitness">
    <h2>Fitness</h2>
    <div id="fitness-data">
      <p>Steps: 10,000</p>
      <p>Distance: 5 miles</p>
      <p>Calories: 500</p>
    </div>
  </section>
  <section id="sleep">
    <h2>Sleep</h2>
    <div id="sleep-data">
      <p>Hours: 7</p>
      <p>Quality: Good</p>
    </div>
  </section>
  <section id="nutrition">
    <h2>Nutrition</h2>
    <div id="nutrition-data">
      <p>Calories: 2000</p>
      <p>Protein: 100g</p>
      <p>Carbs: 300g</p>
      <p>Fat: 50g</p>
    </div>
  </section>
</main>
</body>
</html>
Output
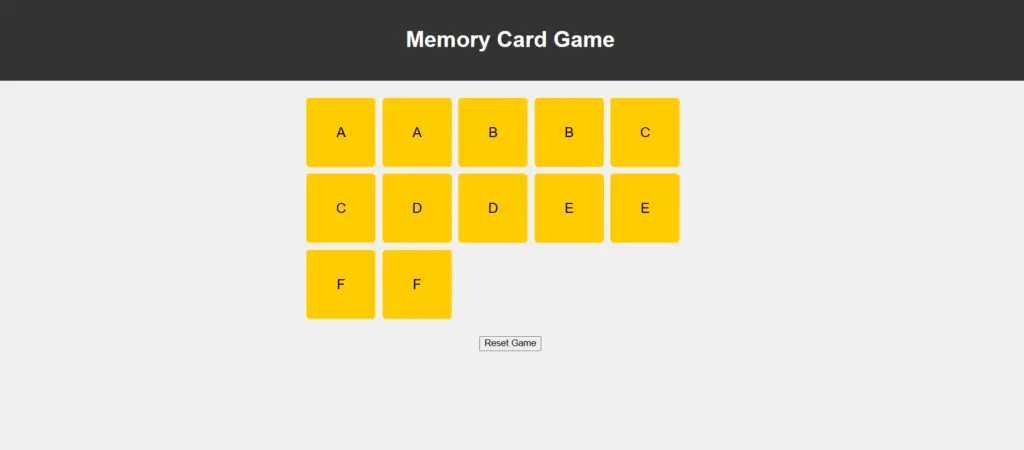
6. Memory Card Game
This project is straightforward and perfect for practising if you are intermediate in coding. The Memory Card Game is a fun activity where players test their memory by flipping cards and matching pairs. This digital version of the game brings the fun and challenge to a virtual platform accessible to players of all ages. Implement a classic memory card game where users flip cards to find matching pairs. Use JavaScript to handle game logic.
Memory Card Game source code
				<!DOCTYPE html>
<html lang="en">
<head>
<meta charset="UTF-8">
<meta name="viewport" content="width=device-width, initial-scale=1.0">
<title>Memory Card Game</title>
<style>
    body {
  font-family: Arial, sans-serif;
  margin: 0;
  padding: 0;
  background-color: #f0f0f0;
}

header {
  background-color: #333;
  color: white;
  padding: 20px;
  text-align: center;
}

main {
  display: flex;
  flex-direction: column;
  align-items: center;
  padding: 20px;
}

#game-board {
  display: flex;
  flex-wrap: wrap;
  max-width: 600px;
  margin-bottom: 20px;
}

.card {
  width: 100px;
  height: 100px;
  margin: 5px;
  background-color: #ffcc00;
  border-radius: 5px;
  display: flex;
  justify-content: center;
  align-items: center;
  font-size: 20px;
  cursor: pointer;
  transition: background-color 0.3s ease;
}

.card:hover {
  background-color: #ff9900;
}
</style>
</head>
<body>
<header>
  <h1>Memory Card Game</h1>
</header>
<main>
  <div id="game-board">
    <!-- Cards will be dynamically added here -->
  </div>
  <button onclick="resetGame()">Reset Game</button>
</main>
<script>
    document.addEventListener("DOMContentLoaded", function() {
  const cards = ["A", "A", "B", "B", "C", "C", "D", "D", "E", "E", "F", "F"];
  let flippedCards = [];

  const gameBoard = document.getElementById("game-board");

  cards.forEach(card => {
    const cardElement = document.createElement("div");
    cardElement.classList.add("card");
    cardElement.textContent = card;
    cardElement.dataset.card = card;
    cardElement.addEventListener("click", flipCard);
    gameBoard.appendChild(cardElement);
  });

  function flipCard() {
    if (flippedCards.length < 2 && !flippedCards.includes(this)) {
      this.classList.add("flipped");
      flippedCards.push(this);
      if (flippedCards.length === 2) {
        setTimeout(checkMatch, 1000);
      }
    }
  }

  function checkMatch() {
    if (flippedCards[0].dataset.card === flippedCards[1].dataset.card) {
      flippedCards.forEach(card => card.classList.add("matched"));
    } else {
      flippedCards.forEach(card => card.classList.remove("flipped"));
    }
    flippedCards = [];
  }
});

function resetGame() {
  const cards = document.querySelectorAll(".card");
  cards.forEach(card => {
    card.classList.remove("flipped", "matched");
  });
}
</script>
</body>
</html>
Output
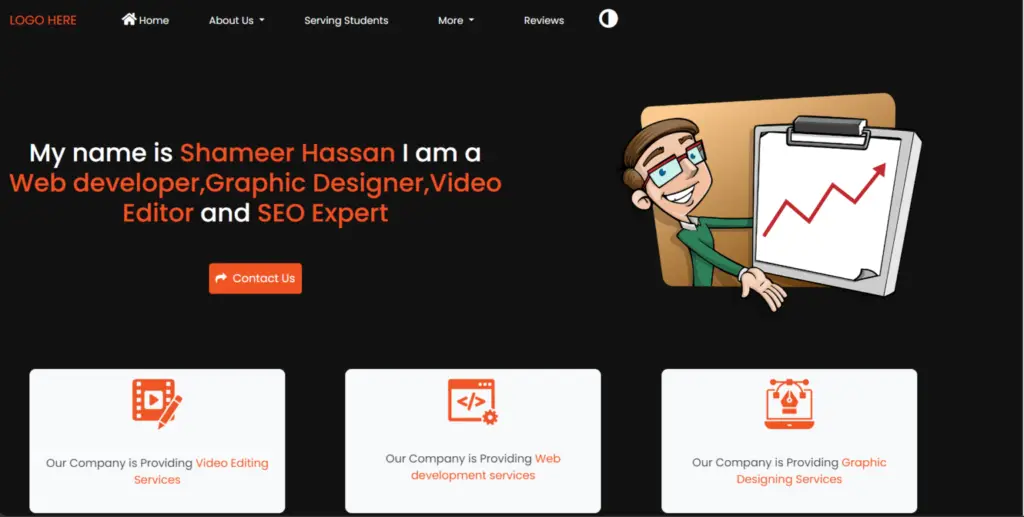
7. Responsive Portfolio Website
The Responsive Portfolio System is an engaging website project designed to showcase an individual’s work. It uses HTML, CSS, and JavaScript to create an interactive and visually appealing online portfolio.
Responsive Portfolio website with source code
<!DOCTYPE html>
<html lang="en">
<head>
<title>ITDesigners</title>
<meta charset="utf-8" />
<meta name="viewport" content="width=device-width, initial-scale=1" />
<link
rel="stylesheet"
href="https://maxcdn.bootstrapcdn.com/bootstrap/4.5.2/css/bootstrap.min.css"
/>
<script src="https://ajax.googleapis.com/ajax/libs/jquery/3.5.1/jquery.min.js"></script>
<link
rel="stylesheet"
href="https://cdnjs.cloudflare.com/ajax/libs/font-awesome/4.7.0/css/font-awesome.min.css"
/>
<script src="https://cdnjs.cloudflare.com/ajax/libs/popper.js/1.16.0/umd/popper.min.js"></script>
<script src="https://maxcdn.bootstrapcdn.com/bootstrap/4.5.2/js/bootstrap.min.js"></script>
<link
rel="stylesheet"
href="https://use.fontawesome.com/releases/v5.7.0/css/all.css"
integrity="sha384-lZN37f5QGtY3VHgisS14W3ExzMWZxybE1SJSEsQp9S+oqd12jhcu+A56Ebc1zFSJ"
crossorigin="anonymous"
/>
<script src="https://kit.fontawesome.com/a076d05399.js"></script>
<script src="https://ajax.googleapis.com/ajax/libs/jquery/3.5.1/jquery.min.js"></script>
<link
rel="stylesheet"
href="https://cdnjs.cloudflare.com/ajax/libs/font-awesome/4.7.0/css/font-awesome.min.css"
/>
<script src="https://cdnjs.cloudflare.com/ajax/libs/jquery/3.4.0/jquery.min.js"></script>
<link rel="stylesheet" href="https://unpkg.com/aos@next/dist/aos.css" />
<link rel="stylesheet" href="css/mainpage.css" />
</head>
<style>
@import url("https://fonts.googleapis.com/css2?family=Poppins:wght@200;300;400;500;600;700&display=swap");
* {
margin: 0;
padding: 0;
}
body {
font-family: "Poppins", sans-serif;
color: white;
background-color: #111111;
}
#navigation {
background-color: #111111;
color: white;
}
a {
color: white;
}
a:hover {
color: #f05423;
}
.dropdown-item:hover {
background-color: #f05423;
color: white;
border-radius: 15px;
}
i:hover {
color: #f05423;
}
span {
color: #f05423;
}
button:hover {
background-color: #111111;
color: #f05423;
border: 2px solid #f05423;
}
button {
background-color: #f05423;
color: white;
width: auto;
height: auto;
border: 2px solid #f05423;
text-align: center;
padding: 9px;
border-radius: 5px;
font-size: 18px;
outline: none;
}
#para {
font-size: 18px;
}
#col1 {
border-radius: 10px;
}
#col1:hover {
background-color: #f05423;
}
#web {
color: #f05423;
}
#case {
font-size: 38px;
}
#g1 {
border-bottom: 2px solid white;
text-align: center;
}
#col2 {
border-right: 3px solid #f05423;
}
#btn1 {
background-color: #f05423;
color: white;
width: 250px;
height: auto;
border: 2px solid #f05423;
text-align: center;
padding: 9px;
border-radius: 5px;
font-size: 18px;
outline: none;
}
#btn1:hover {
background-color: #111111;
color: #f05423;
border: 2px solid #f05423;
}
#col2 {
font-size: 20px;
}
#col4 {
border-right: 2px solid #f05423;
}
#footer {
background-color: #1e1e1e;
}
#scroll {
border-top: 2px solid #f05423;
}
</style>
<body id="bd">
<script>
$(document).ready(function () {
$("#all").css("background-color", "#F05423");
$("#one").show("slow");
$("#two").show("slow");
$("#three").show("slow");
$("#four").show("slow");
$("#five").show("slow");
$("#six").show("slow");
$("#all").click(function () {
$("#one").show("slow");
$("#two").show("slow");
$("#three").show("slow");
$("#four").show("slow");
$("#five").show("slow");
$("#six").show("slow");
$("#bcard").css("background-color", "#111111");
$("#all").css("background-color", "#F05423");
$("#social").css("background-color", "#111111");
$("#books").css("background-color", "#111111");
$("flyer").css("background-color", "#111111");
$("#logos").css("background-color", "#111111");
$("#letters").css("background-color", "#111111");
});
$("#bcard").click(function () {
$("#one").hide("slow");
$("#two").hide("slow");
$("#three").show("slow");
$("#four").hide("slow");
$("#five").hide("slow");
$("#six").hide("slow");
$("#bcard").css("background-color", "#F05423");
$("#all").css("background-color", "#111111");
$("#social").css("background-color", "#111111");
$("#books").css("background-color", "#111111");
$("flyer").css("background-color", "#111111");
$("#logos").css("background-color", "#111111");
$("#letters").css("background-color", "#111111");
});
$("#logos").click(function () {
$("#one").show("slow");
$("#two").hide("slow");
$("#three").hide("slow");
$("#four").hide("slow");
$("#five").hide("slow");
$("#six").hide("slow");
$("#bcard").css("background-color", "#111111");
$("#all").css("background-color", "#111111");
$("#social").css("background-color", "#111111");
$("#books").css("background-color", "#111111");
$("flyer").css("background-color", "#111111");
$("#logos").css("background-color", "#F05423");
$("#letters").css("background-color", "#111111");
});
$("#books").click(function () {
$("#one").hide("slow");
$("#two").hide("slow");
$("#three").hide("slow");
$("#four").show("slow");
$("#five").hide("slow");
$("#six").hide("slow");
$("#bcard").css("background-color", "#111111");
$("#all").css("background-color", "#111111");
$("#social").css("background-color", "#111111");
$("#books").css("background-color", "#F05423");
$("flyer").css("background-color", "#111111");
$("#logos").css("background-color", "#111111");
$("#letters").css("background-color", "#111111");
});
$("#poster").click(function () {
$("#one").hide("slow");
$("#two").show("slow");
$("#three").hide("slow");
$("#four").hide("slow");
$("#five").hide("slow");
$("#six").hide("slow");
$("#bcard").css("background-color", "#111111");
$("#all").css("background-color", "#111111");
$("#social").css("background-color", "#111111");
$("#books").css("background-color", "#111111");
$("poster").css("background-color", "#F05423");
$("#logos").css("background-color", "#111111");
$("#letters").css("background-color", "#111111");
});
$("#letters").click(function () {
$("#one").hide("slow");
$("#two").hide("slow");
$("#three").hide("slow");
$("#four").hide("slow");
$("#five").hide("slow");
$("#six").show("slow");
$("#bcard").css("background-color", "#111111");
$("#all").css("background-color", "#111111");
$("#social").css("background-color", "#111111");
$("#books").css("background-color", "#111111");
$("flyer").css("background-color", "#111111");
$("#logos").css("background-color", "#111111");
$("#letters").css("background-color", "#F05423");
});
});
</script>
<nav id="navigation" class="navbar navbar-expand-md">
<a class="navbar-brand" href="#">LOGO HERE</a>
<button
class="navbar-toggler"
type="button"
data-toggle="collapse"
data-target="#collapsibleNavbar"
>
<span
><i
style="color: white"
class="fa fa-bars"
style="font-size: 46px"
></i
></span>
</button>
<div class="collapse navbar-collapse" id="collapsibleNavbar">
<ul class="navbar-nav">
<li class="nav-item pt-3">
<a class="nav-link ml-5" href="index.html"
><i class="fas fa-home" style="font-size: 21px"></i> Home</a
>
</li>
<li class="nav-item dropdown ml-5 pt-3">
<a
class="nav-link dropdown-toggle"
href="#"
id="navbardrop"
data-toggle="dropdown"
>
About Us
</a>
<div class="dropdown-menu">
<a class="dropdown-item" href="loc.html">Location</a>
<a class="dropdown-item" href="team.html">Team</a>
<a class="dropdown-item" href="contact.html">Contact</a>
<a class="dropdown-item" href="instructors.html">Instructors</a>
</div>
</li>
<li class="nav-item ml-5 pt-3">
<a class="nav-link" href="services.html">Serving Students</a>
</li>
<li class="nav-item dropdown ml-5 p-3">
<a
class="nav-link dropdown-toggle"
href="#"
id="navbardrop"
data-toggle="dropdown"
>
More
</a>
<div class="dropdown-menu">
<a class="dropdown-item" href="cpage.html">Reviews</a>
<a class="dropdown-item" href="news.html">Newsfeed</a>
</div>
</li>
<li class="nav-item ml-5 pt-3">
<a class="nav-link" href="cpage.html">Reviews</a>
</li>
<li class="nav-item ml-5 pt-3">
<i
style="font-size: 35px; color: white"
class="fa fa-adjust change"
></i>
<p id="p2"></p>
</li>
</ul>
</div>
</nav>
<div class="container-fluid">
<div class="row">
<div class="col-sm-6 text-center">
<br />
<br />
<br />
<br />
<br />
<br />
<h1>
My name is <span>ITDesigners</span> I am a
<span>Web developer,Graphic Designer,Video Editor</span> and
<span>SEO Expert </span>
</h1>
<br /><br />
<button>
<i class="fa fa-share" style="font-size: 18px; color: white"></i>
 Contact Us
</button>
<br /><br /><br /><br />
</div>
<div class="col-sm-6 text-center">
<br /><br /><br />
<img
class="img-fluid"
src="https://cdn.pixabay.com/photo/2016/06/13/15/07/presentation-1454403_960_720.png"
width="500px"
/>
</div>
</div>
</div>
<div class="container-fluid">
<div class="row">
<div
id="col1"
data-aos="flip-right"
class="bg-light col-sm-3 text-center text-dark m-5"
>
<img class="img-fluid m-3" src="images/icon3.png" width="80px" />
<br /><br />
<p id="para">
Our Company is Providing <span><a>Video Editing Services</a></span>
</p>
<br />
</div>
<div
id="col1"
data-aos="flip-left"
class="bg-light col-sm-3 text-center text-dark m-5"
>
<img class="img-fluid m-3" src="images/icon1.png" width="80px" />
<br /><br />
<p id="para">
Our Company is Providing
<span><a id="web" href="">Web development services </a></span>
</p>
<br />
</div>
<div
id="col1"
data-aos="flip-up"
class="bg-light col-sm-3 text-center text-dark m-5"
>
<img class="img-fluid m-3" src="images/icon2.png" width="80px" />
<br /><br />
<p id="para">
Our Company is Providing
<span><a>Graphic Designing Services</a> </span>
</p>
<br />
</div>
</div>
<br /><br /><br /><br />
</div>
<div class="container-fluid" data-aos="fade-up">
<div class="row">
<div class="col-sm-6 text-center">
<br />
<h1>Video Editing</h1>
<br />
<p id="para">
<span id="case">Be seen where everyone is watching</span><br />
With YouTube ads, reach potential customers and have them take
action when they watch or search for videos on YouTube – and only
pay when they show interest.
</p>
<br />
<button>
<i class="fa fa-share" style="font-size: 18px; color: white"></i>
 Try Video editing Service
</button>
</div>
<div class="col-sm-6 text-center">
<br /><br /><br />
<img src="images/video.png" width="500px" />
<br /><br /><br /><br /><br /><br />
</div>
</div>
</div>
<div class="container-fluid" data-aos="fade-up">
<div class="row">
<div class="col-sm-6 text-center">
<br /><br /><br />
<img src="images/graphic.png" width="500px" />
<br /><br /><br /><br /><br /><br />
</div>
<div class="col-sm-6 text-center">
<br />
<h1>Graphic Designing</h1>
<br />
<p id="para">
<span id="case">Design is Intelligence made Visible</span><br />
Wherever you are on your graphic design voyage, you’ll need guidance
from time to time as you navigate the murky waters of creativity.
What better place to look than the quotes of famous designers? After
all, these men and women didn’t become icons of their industry
without solving a problem or two along the way.
</p>
<br />
<button>
<a class="nav-link" href="graphic.html">
<i class="fa fa-share" style="font-size: 18px; color: white"></i>
 Try Graphic Designing Service</a
>
</button>
</div>
</div>
</div>
<div class="container-fluid" data-aos="fade-up">
<div class="row">
<div class="col-sm-6 text-center">
<br /><br /><br /><br /><br />
<h1>Web Development</h1>
<br />
<p id="para">
<span id="case">Code! Coding is Life</span><br />
By developing a web you cand increase interaction with your clients
and audience.You can enhance you sale by developing you own
web.........!
</p>
<br />
<button>
<i class="fa fa-share" style="font-size: 18px; color: white"></i>
 Try Web Development Service
</button>
</div>
<div class="col-sm-6 text-center">
<br /><br /><br />
<img src="images/web.png" width="500px" />
<br /><br /><br /><br /><br /><br />
</div>
</div>
</div>
<div id="footer" class="container-fluid">
<div class="row">
<div class="col-sm-3 text-center">
<br />
<br />
<h1>LOGO HERE</h1>
<br />
<br />
<br />
<a href="#" class="fa fa-facebook" style="font-size: 30px"></a>
<a href="#" class="fa fa-instagram ml-5" style="font-size: 30px"></a>
<a href="#" class="fa fa-youtube ml-5" style="font-size: 30px"></a>
<br />
<br />
<br />
<br />
</div>
<div class="col-sm-5 text-center">
<br />
<br />
<br />
<br />
<p id="para">@All rights are reserved by IT DESIGNERS</p>
</div>
<div class="col-sm-4 text-center">
<br /><br />
<p id="para">
<a href="">Visit Youtube Channel </a><br /><br />
<a href="">Send Email</a><br /><br />
<a href="">Contact On messenger</a><br /><br />
<a href="">Cotact on Facebook</a><br /><br />
</p>
</div>
</div>
</div>
<script src="https://unpkg.com/aos@next/dist/aos.js"></script>
<script>
AOS.init({
duration: 700,
});
</script>
</body>
</html>
Output
8. Augmented Reality Experience
This advanced-level project lets you create experiences where virtual things appear in your surroundings. The Augmented Reality Experience website is designed to provide users with a mix of virtual and real worlds. By using augmented reality (AR) technology, the platform overlays digital content onto the user’s physical environment. This website lets users explore AR experiences on their web browsers, making online engagement more interactive with a combination of reality and digital elements.
Augmented reality experience source code
				<!DOCTYPE html>
<html lang="en">
<head>
  <meta charset="UTF-8">
  <meta name="viewport" content="width=device-width, initial-scale=1.0">
  <title>Augmented Reality Experience</title>
  <script src="https://aframe.io/releases/1.2.0/aframe.min.js"></script>
  <script src="https://raw.githack.com/AR-js-org/AR.js/master/aframe/build/aframe-ar.js"></script>
  <style>
    body {
      margin: 0;
      overflow: hidden;
    }
  </style>
</head>
<body>
  <a-scene embedded arjs>
    <a-marker preset="hiro">
      <a-box position="0 0.5 0" material="color: red;"></a-box>
    </a-marker>
    <a-entity camera></a-entity>
  </a-scene>
</body>
</html>
Output
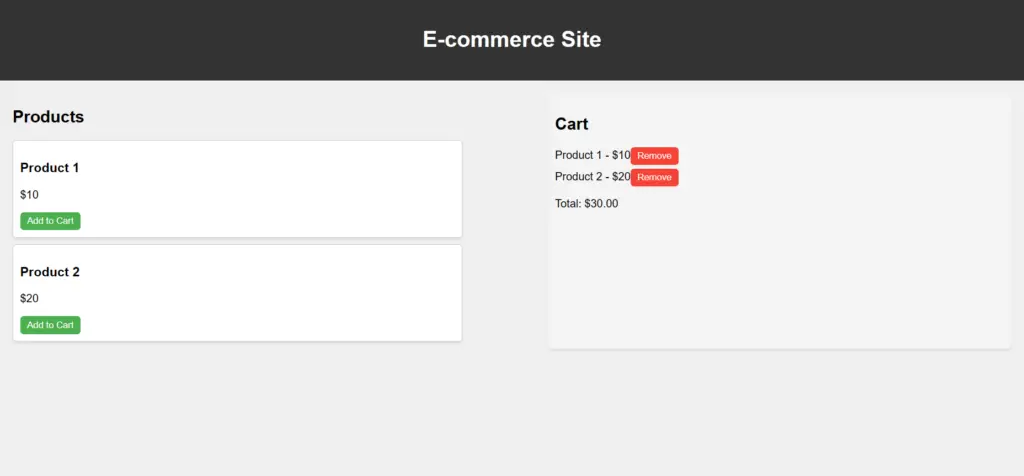
9. E-commerce Site
Ready for a challenge? Build a fully functional e-commerce website. The E-commerce Site is a comprehensive online platform that facilitates the buying and selling of goods and services over the Internet. This digital marketplace aims to provide users with a seamless and secure shopping experience, featuring a wide range of products, user-friendly navigation, and secure payment options. This project is a giant leap towards mastering web development.
Ecommerce site source code
				<!DOCTYPE html>
<html lang="en">
<head>
<meta charset="UTF-8">
<meta name="viewport" content="width=device-width, initial-scale=1.0">
<title>E-commerce Site</title>
<style>
    body {
  font-family: Arial, sans-serif;
  margin: 0;
  padding: 0;
  background-color: #f0f0f0;
}

header {
  background-color: #333;
  color: white;
  padding: 20px;
  text-align: center;
}

main {
  padding: 20px;
  display: flex;
  justify-content: space-between;
}

section {
  width: 45%;
}

.product {
  border: 1px solid #ccc;
  padding: 10px;
  margin-bottom: 10px;
  border-radius: 5px;
  background-color: white;
  box-shadow: 0 2px 4px rgba(0, 0, 0, 0.1);
}

button {
  background-color: #4CAF50;
  color: white;
  border: none;
  border-radius: 5px;
  padding: 5px 10px;
  cursor: pointer;
  transition: background-color 0.3s ease;
}

button:hover {
  background-color: #45a049;
}

#cart {
  background-color: #f4f4f4;
  border-radius: 5px;
  padding: 10px;
  box-shadow: 0 2px 4px rgba(0, 0, 0, 0.1);
}

#cart-items {
  padding: 0;
  list-style-type: none;
}

#cart-items li {
  margin-bottom: 5px;
}

#cart-items li button {
  background-color: #f44336;
}

#cart-items li button:hover {
  background-color: #d32f2f;
}
</style>
</head>
<body>
<header>
  <h1>E-commerce Site</h1>
</header>
<main>
  <section id="products">
    <h2>Products</h2>
    <div class="product" data-id="1">
      <h3>Product 1</h3>
      <p>$10</p>
      <button onclick="addToCart(1)">Add to Cart</button>
    </div>
    <div class="product" data-id="2">
      <h3>Product 2</h3>
      <p>$20</p>
      <button onclick="addToCart(2)">Add to Cart</button>
    </div>
    <!-- More products can be added here -->
  </section>
  <section id="cart">
    <h2>Cart</h2>
    <ul id="cart-items"></ul>
    <p>Total: $<span id="cart-total">0</span></p>
  </section>
</main>
<script>
    let cart = [];

function addToCart(productId) {
  const product = document.querySelector(`[data-id="${productId}"]`);
  const productName = product.querySelector("h3").textContent;
  const productPrice = parseFloat(product.querySelector("p").textContent.replace("$", ""));

  cart.push({ id: productId, name: productName, price: productPrice });

  updateCart();
}

function updateCart() {
  const cartItems = document.getElementById("cart-items");
  const cartTotal = document.getElementById("cart-total");

  cartItems.innerHTML = "";

  let total = 0;

  cart.forEach(item => {
    const li = document.createElement("li");
    li.textContent = `${item.name} - $${item.price}`;

    const removeButton = document.createElement("button");
    removeButton.textContent = "Remove";
    removeButton.onclick = () => removeFromCart(item.id);

    li.appendChild(removeButton);
    cartItems.appendChild(li);

    total += item.price;
  });

  cartTotal.textContent = total.toFixed(2);
}

function removeFromCart(productId) {
  cart = cart.filter(item => item.id !== productId);
  updateCart();
}
</script>
</body>
</html>
Output
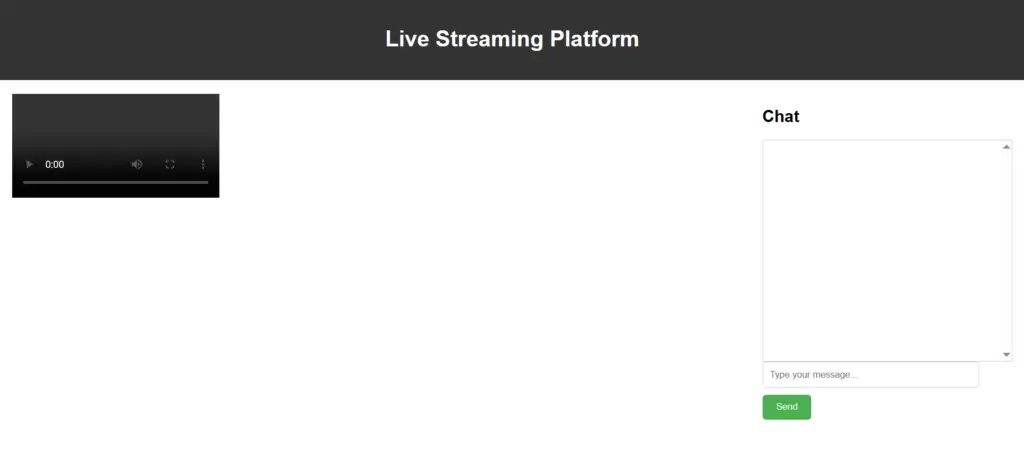
10. Live Streaming Platform website
The Live Streaming Platform is designed to provide users with a captivating and real-time streaming experience. Users can access live content, interact with streamers, and engage with a community of viewers. The website uses HTML, CSS, and JavaScript to create an engaging platform for people to enjoy and share live streams.
Live streaming platform source code
				<!DOCTYPE html>
<html lang="en">
<head>
<meta charset="UTF-8">
<meta name="viewport" content="width=device-width, initial-scale=1.0">
<title>Live Streaming Platform</title>
<style>
    body {
  font-family: Arial, sans-serif;
  margin: 0;
  padding: 0;
}

header {
  background-color: #333;
  color: white;
  padding: 20px;
  text-align: center;
}

main {
  padding: 20px;
  display: flex;
  justify-content: space-between;
}

#live-stream {
  width: 70%;
}

#chat {
  width: 25%;
}

#chat-messages {
  height: 300px;
  overflow-y: scroll;
  border: 1px solid #ccc;
  padding: 10px;
}

input[type="text"] {
  width: calc(100% - 70px);
  padding: 10px;
  margin-bottom: 10px;
  border: 1px solid #ccc;
  border-radius: 5px;
}

button {
  padding: 10px 20px;
  background-color: #4CAF50;
  color: white;
  border: none;
  border-radius: 5px;
  cursor: pointer;
}

button:hover {
  background-color: #45a049;
}
</style>
</head>
<body>
<header>
  <h1>Live Streaming Platform</h1>
</header>
<main>
  <div id="live-stream">
    <video controls autoplay>
      <source src="https://www.sample-videos.com/video123/mp4/720/big_buck_bunny_720p_1mb.mp4" type="video/mp4">
      Your browser does not support the video tag.
    </video>
  </div>
  <div id="chat">
    <h2>Chat</h2>
    <div id="chat-messages"></div>
    <input type="text" id="message-input" placeholder="Type your message...">
    <button onclick="sendMessage()">Send</button>
  </div>
</main>
<script>
    function sendMessage() {
  const messageInput = document.getElementById("message-input");
  const message = messageInput.value.trim();

  if (message !== "") {
    const chatMessages = document.getElementById("chat-messages");
    const messageElement = document.createElement("div");
    messageElement.textContent = message;
    chatMessages.appendChild(messageElement);

    messageInput.value = "";
  }
}
</script>
</body>
</html>
Output
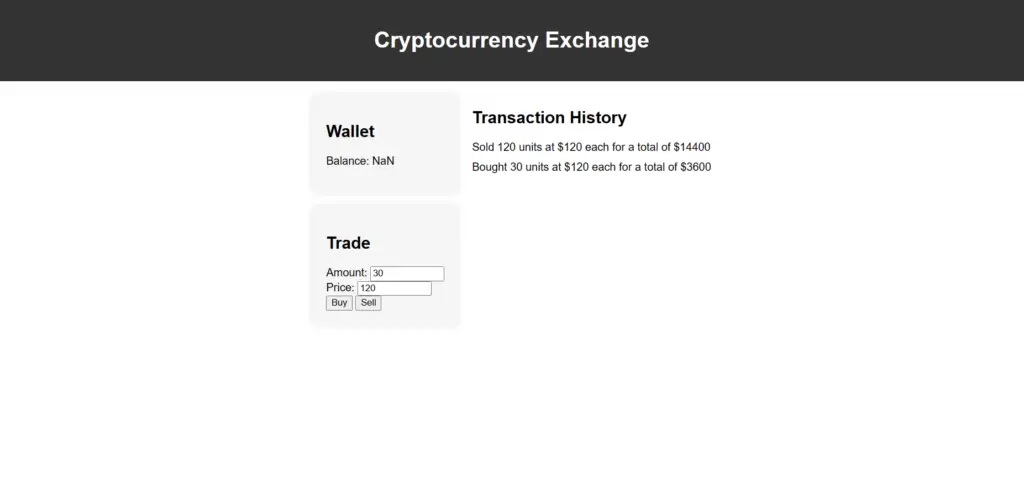
11. Cryptocurrency Exchange
A Cryptocurrency Exchange is a digital platform that facilitates the buying, selling, and trading various cryptocurrencies. It is an online marketplace where users can exchange their digital assets, providing a vital infrastructure for the crypto ecosystem. In the Cryptocurrency Exchange system, user input involves creating accounts, depositing or withdrawing funds, and placing buy or sell orders for cryptocurrencies. The output is the execution of these transactions, resulting in updated account balances and a record of completed trades.
Cryptocurrency exchange source code
				<!DOCTYPE html>
<html lang="en">
<head>
    <meta charset="UTF-8">
    <meta name="viewport" content="width=device-width, initial-scale=1.0">
    <title>Cryptocurrency Exchange</title>
    <style>
        body {
            font-family: Arial, sans-serif;
            margin: 0;
            padding: 0;
        }

        header {
            background-color: #333;
            color: white;
            padding: 20px;
            text-align: center;
        }

        main {
            display: flex;
            justify-content: center;
            align-items: flex-start;
            padding: 20px;
        }

        #exchange {
            display: flex;
            flex-direction: column;
            gap: 20px;
        }

        #wallet, #trade {
            background-color: #f5f5f5;
            border-radius: 5px;
            padding: 20px;
            box-shadow: 0 0 10px rgba(0, 0, 0, 0.1);
        }

        #trade input[type="number"] {
            width: 100px;
        }

        #transactions {
            margin-left: 20px;
        }

        #transaction-list {
            list-style: none;
            padding: 0;
        }

        #transaction-list li {
            margin-bottom: 10px;
        }
    </style>
</head>
<body>
    <header>
        <h1>Cryptocurrency Exchange</h1>
    </header>
    <main>
        <section id="exchange">
            <div id="wallet">
                <h2>Wallet</h2>
                <p>Balance: <span id="balance">$100</span></p>
            </div>
            <div id="trade">
                <h2>Trade</h2>
                <div>
                    <label for="amount">Amount:</label>
                    <input type="number" id="amount" placeholder="0">
                </div>
                <div>
                    <label for="price">Price:</label>
                    <input type="number" id="price" placeholder="0">
                </div>
                <button id="buy">Buy</button>
                <button id="sell">Sell</button>
            </div>
        </section>
        <section id="transactions">
            <h2>Transaction History</h2>
            <ul id="transaction-list">
                <!-- Transaction items will be added here -->
            </ul>
        </section>
    </main>
    <script>
        document.addEventListener("DOMContentLoaded", function() {
            const balanceElement = document.getElementById("balance");
            const amountInput = document.getElementById("amount");
            const priceInput = document.getElementById("price");
            const buyButton = document.getElementById("buy");
            const sellButton = document.getElementById("sell");
            const transactionList = document.getElementById("transaction-list");

            buyButton.addEventListener("click", function() {
                const amount = parseFloat(amountInput.value);
                const price = parseFloat(priceInput.value);
                const total = amount * price;
                balanceElement.textContent = parseFloat(balanceElement.textContent) - total;
                const listItem = document.createElement("li");
                listItem.textContent = `Bought ${amount} units at $${price} each for a total of $${total}`;
                transactionList.appendChild(listItem);
            });

            sellButton.addEventListener("click", function() {
                const amount = parseFloat(amountInput.value);
                const price = parseFloat(priceInput.value);
                const total = amount * price;
                balanceElement.textContent = parseFloat(balanceElement.textContent) + total;
                const listItem = document.createElement("li");
                listItem.textContent = `Sold ${amount} units at $${price} each for a total of $${total}`;
                transactionList.appendChild(listItem);
            });
        });
    </script>
</body>
</html>
Output
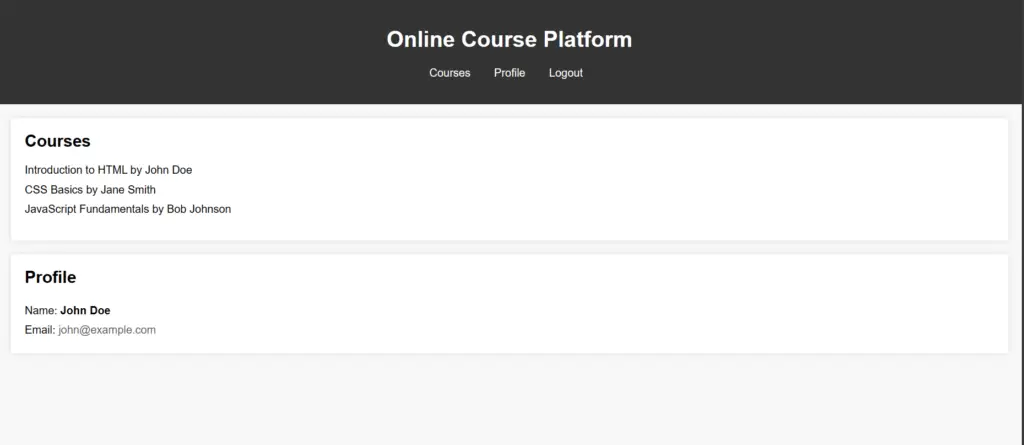
12. Online Learning Platform
An Online Learning Platform is a digital space facilitating remote education, offering various courses, lectures, and interactive content. It allows learners to acquire new skills and knowledge from the comfort of their environment.
Online learning Platform source code
				<!DOCTYPE html>
<html lang="en">
<head>
    <meta charset="UTF-8">
    <meta name="viewport" content="width=device-width, initial-scale=1.0">
    <title>Online Course Platform</title>
    <style>
        body {
    font-family: Arial, sans-serif;
    margin: 0;
    padding: 0;
    background-color: #f8f8f8;
}

header {
    background-color: #333;
    color: white;
    padding: 20px;
    text-align: center;
}

nav ul {
    list-style: none;
    padding: 0;
}

nav ul li {
    display: inline-block;
    margin-right: 10px;
}

nav ul li a {
    color: white;
    text-decoration: none;
    padding: 10px;
    border-radius: 5px;
    transition: background-color 0.3s;
}

nav ul li a:hover {
    background-color: #555;
}

main {
    padding: 20px;
}

section {
    margin-bottom: 40px;
    background-color: white;
    padding: 20px;
    border-radius: 5px;
    box-shadow: 0 0 10px rgba(0, 0, 0, 0.1);
}

h2 {
    margin-top: 0;
}

#course-list {
    list-style: none;
    padding: 0;
}

#course-list li {
    margin-bottom: 10px;
}

#profile {
    display: flex;
    flex-direction: column;
    align-items: flex-start;
}

#profile p {
    margin: 5px 0;
}

#profile-name {
    font-weight: bold;
}

#profile-email {
    color: #666;
}

footer {
    background-color: #333;
    color: white;
    text-align: center;
    padding: 20px;
}

        body {
            font-family: Arial, sans-serif;
            margin: 0;
            padding: 0;
        }

        header {
            background-color: #333;
            color: white;
            padding: 20px;
            text-align: center;
        }

        nav ul {
            list-style: none;
            padding: 0;
        }

        nav ul li {
            display: inline-block;
            margin-right: 10px;
        }

        nav ul li a {
            color: white;
            text-decoration: none;
        }

        main {
            padding: 20px;
        }

        section {
            margin-bottom: 20px;
        }

        #course-list {
            list-style: none;
            padding: 0;
        }

        #course-list li {
            margin-bottom: 10px;
        }
    </style>
</head>
<body>
    <header>
        <h1>Online Course Platform</h1>
        <nav>
            <ul>
                <li><a href="#courses">Courses</a></li>
                <li><a href="#profile">Profile</a></li>
                <li><a href="#logout">Logout</a></li>
            </ul>
        </nav>
    </header>
    <main>
        <section id="courses">
            <h2>Courses</h2>
            <ul id="course-list">
                <!-- Course items will be added here -->
            </ul>
        </section>
        <section id="profile">
            <h2>Profile</h2>
            <p>Name: <span id="profile-name">John Doe</span></p>
            <p>Email: <span id="profile-email">john@example.com</span></p>
        </section>
    </main>
    <script>
        document.addEventListener("DOMContentLoaded", function() {
            // Simulated data for courses
            const courses = [
                { id: 1, title: "Introduction to HTML", instructor: "John Doe" },
                { id: 2, title: "CSS Basics", instructor: "Jane Smith" },
                { id: 3, title: "JavaScript Fundamentals", instructor: "Bob Johnson" }
            ];

            // Display courses
            const courseList = document.getElementById("course-list");
            courses.forEach(course => {
                const listItem = document.createElement("li");
                listItem.textContent = `${course.title} by ${course.instructor}`;
                courseList.appendChild(listItem);
            });

            // Simulated user profile data
            const profileName = document.getElementById("profile-name");
            const profileEmail = document.getElementById("profile-email");
            profileName.textContent = "John Doe";
            profileEmail.textContent = "john@example.com";
        });
    </script>
</body>
</html>
Output
13. Expense Tracker
The Expense Tracker is a digital tool designed to help users manage their finances by keeping track of their expenses. It provides a convenient way to monitor spending, set budgets, and gain insights into financial habits. This system enables real-time updates, category filtering, and budget calculations, providing a responsive and efficient user experience.
Expense Tracker Source Code
				<!DOCTYPE html>
<html lang="en">
<head>
    <meta charset="UTF-8">
    <meta name="viewport" content="width=device-width, initial-scale=1.0">
    <title>Expense Tracker</title>
    <style>
        body {
            font-family: Arial, sans-serif;
            margin: 0;
            padding: 0;
        }

        header {
            background-color: #333;
            color: white;
            padding: 20px;
            text-align: center;
        }

        main {
            padding: 20px;
        }

        form {
            display: flex;
            flex-direction: column;
            gap: 10px;
        }

        label {
            font-weight: bold;
        }

        input, button {
            padding: 5px;
            border-radius: 5px;
            border: 1px solid #ccc;
        }

        button {
            cursor: pointer;
        }

        ul {
            list-style: none;
            padding: 0;
        }

        li {
            background-color: #f5f5f5;
            padding: 10px;
            border-radius: 5px;
            margin-bottom: 10px;
        }

        #total-expenses {
            font-weight: bold;
        }
    </style>
</head>
<body>
    <header>
        <h1>Expense Tracker</h1>
    </header>
    <main>
        <form id="expense-form">
            <label for="description">Description:</label>
            <input type="text" id="description" required>
            <label for="amount">Amount:</label>
            <input type="number" id="amount" required>
            <button type="submit">Add Expense</button>
        </form>
        <ul id="expense-list">
            <!-- Expense items will be added here -->
        </ul>
        <p id="total-expenses">Total Expenses: $0</p>
    </main>
    <script>
        document.addEventListener("DOMContentLoaded", function() {
            const expenseForm = document.getElementById("expense-form");
            const descriptionInput = document.getElementById("description");
            const amountInput = document.getElementById("amount");
            const expenseList = document.getElementById("expense-list");
            const totalExpenses = document.getElementById("total-expenses");

            let expenses = [];

            expenseForm.addEventListener("submit", function(event) {
                event.preventDefault();
                const description = descriptionInput.value;
                const amount = parseFloat(amountInput.value);
                if (description && amount) {
                    const expense = { description, amount };
                    expenses.push(expense);
                    renderExpenses();
                    descriptionInput.value = "";
                    amountInput.value = "";
                }
            });

            function renderExpenses() {
                expenseList.innerHTML = "";
                let total = 0;
                expenses.forEach((expense, index) => {
                    const listItem = document.createElement("li");
                    listItem.textContent = `${expense.description}: $${expense.amount}`;
                    const deleteButton = document.createElement("button");
                    deleteButton.textContent = "Delete";
                    deleteButton.addEventListener("click", function() {
                        expenses.splice(index, 1);
                        renderExpenses();
                    });
                    listItem.appendChild(deleteButton);
                    expenseList.appendChild(listItem);
                    total += expense.amount;
                });
                totalExpenses.textContent = `Total Expenses: $${total}`;
            }
        });
    </script>
</body>
</html>
Output
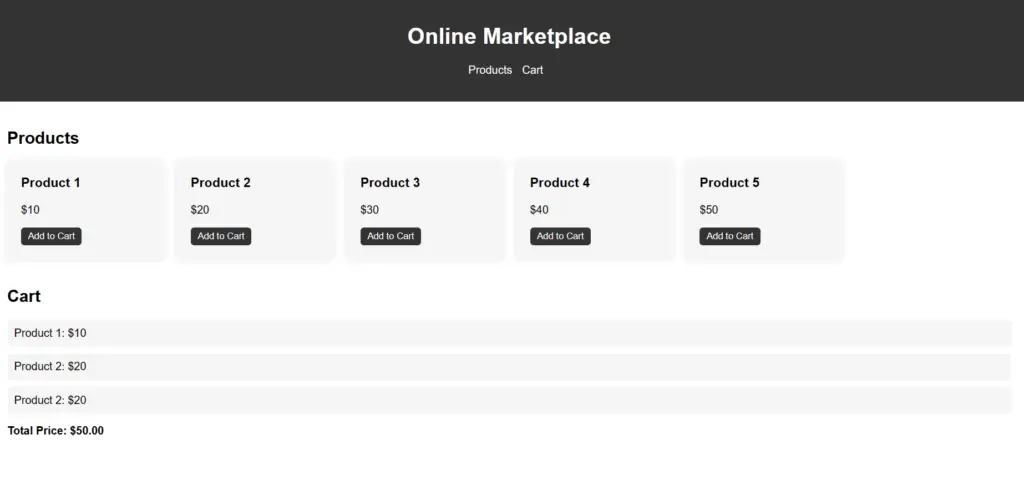
14. Online Marketplace
The Online Marketplace is a digital platform that connects buyers and sellers, offering various products and services. This virtual marketplace provides a convenient and accessible space for users to explore, purchase, and sell items from multiple categories. The project used HTML, CSS, and JavaScript backend technologies to create a dynamic and user-friendly online marketplace.
Online Marketplace Source Code
				<!DOCTYPE html>
<html lang="en">
<head>
    <meta charset="UTF-8">
    <meta name="viewport" content="width=device-width, initial-scale=1.0">
    <title>Online Marketplace</title>
    <style>
        body {
            font-family: Arial, sans-serif;
            margin: 0;
            padding: 0;
        }

        header {
            background-color: #333;
            color: white;
            padding: 20px;
            text-align: center;
        }

        nav ul {
            list-style: none;
            padding: 0;
        }

        nav ul li {
            display: inline-block;
            margin-right: 10px;
        }

        nav ul li a {
            color: white;
            text-decoration: none;
        }

        main {
            padding: 20px;
        }

        section {
            margin-bottom: 40px;
        }

        #product-list {
            display: grid;
            grid-template-columns: repeat(auto-fill, minmax(200px, 1fr));
            gap: 20px;
        }

        .product {
            background-color: #f5f5f5;
            padding: 20px;
            border-radius: 5px;
            box-shadow: 0 0 10px rgba(0, 0, 0, 0.1);
        }

        .product h3 {
            margin-top: 0;
        }

        .product button {
            padding: 5px 10px;
            border: none;
            background-color: #333;
            color: white;
            border-radius: 5px;
            cursor: pointer;
        }

        .product button:hover {
            background-color: #555;
        }

        #cart-list {
            list-style: none;
            padding: 0;
        }

        #cart-list li {
            background-color: #f5f5f5;
            padding: 10px;
            border-radius: 5px;
            margin-bottom: 10px;
        }

        #total-price {
            font-weight: bold;
        }
    </style>
</head>
<body>
    <header>
        <h1>Online Marketplace</h1>
        <nav>
            <ul>
                <li><a href="#products">Products</a></li>
                <li><a href="#cart">Cart</a></li>
            </ul>
        </nav>
    </header>
    <main>
        <section id="products">
            <h2>Products</h2>
            <div id="product-list">
                <!-- Product items will be added here -->
            </div>
        </section>
        <section id="cart">
            <h2>Cart</h2>
            <ul id="cart-list">
                <!-- Cart items will be added here -->
            </ul>
            <p id="total-price">Total Price: $0</p>
        </section>
    </main>
    <script>
        document.addEventListener("DOMContentLoaded", function() {
            const productList = document.getElementById("product-list");
            const cartList = document.getElementById("cart-list");
            const totalPrice = document.getElementById("total-price");

            const products = [
                { id: 1, name: "Product 1", price: 10 },
                { id: 2, name: "Product 2", price: 20 },
                { id: 3, name: "Product 3", price: 30 },
                { id: 4, name: "Product 4", price: 40 },
                { id: 5, name: "Product 5", price: 50 }
            ];

            products.forEach(product => {
                const productItem = document.createElement("div");
                productItem.classList.add("product");
                productItem.innerHTML = `
                    <h3>${product.name}</h3>
                    <p>$${product.price}</p>
                    <button data-id="${product.id}">Add to Cart</button>
                `;
                productList.appendChild(productItem);
            });

            productList.addEventListener("click", function(event) {
                if (event.target.tagName === "BUTTON") {
                    const productId = parseInt(event.target.getAttribute("data-id"));
                    const product = products.find(p => p.id === productId);
                    const cartItem = document.createElement("li");
                    cartItem.textContent = `${product.name}: $${product.price}`;
                    cartList.appendChild(cartItem);
                    updateTotalPrice();
                }
            });

            function updateTotalPrice() {
                let total = 0;
                cartList.querySelectorAll("li").forEach(item => {
                    const price = parseFloat(item.textContent.split("$")[1]);
                    total += price;
                });
                totalPrice.textContent = `Total Price: $${total.toFixed(2)}`;
            }
        });
    </script>
</body>
</html>
Output
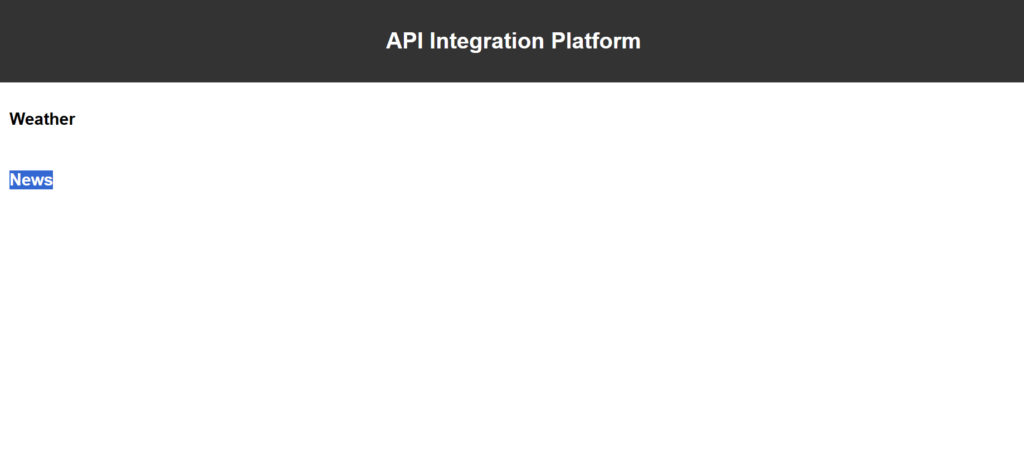
15. API Integration Platform
Build a platform that seamlessly integrates with multiple APIs. This platform acts as a bridge between different software applications, allowing them to communicate, share data, and work together efficiently. The project uses HTML, CSS, JavaScript, and backend technologies to create an easy-to-use interface for managing and organizing API integrations.
API Integration Platform Source Code
				<!DOCTYPE html>
<html lang="en">
<head>
    <meta charset="UTF-8">
    <meta name="viewport" content="width=device-width, initial-scale=1.0">
    <title>API Integration Platform</title>
    <style>
        body {
            font-family: Arial, sans-serif;
            margin: 0;
            padding: 0;
        }

        header {
            background-color: #333;
            color: white;
            padding: 20px;
            text-align: center;
        }

        main {
            padding: 20px;
        }

        section {
            margin-bottom: 40px;
        }

        #weather-info, #news-info {
            display: grid;
            grid-template-columns: repeat(auto-fill, minmax(200px, 1fr));
            gap: 20px;
        }

        .card {
            background-color: #f5f5f5;
            padding: 20px;
            border-radius: 5px;
            box-shadow: 0 0 10px rgba(0, 0, 0, 0.1);
        }

        .card h3 {
            margin-top: 0;
        }

        .card p {
            margin-bottom: 0;
        }
    </style>
</head>
<body>
    <header>
        <h1>API Integration Platform</h1>
    </header>
    <main>
        <section id="weather">
            <h2>Weather</h2>
            <div id="weather-info">
                <!-- Weather information will be added here -->
            </div>
        </section>
        <section id="news">
            <h2>News</h2>
            <div id="news-info">
                <!-- News information will be added here -->
            </div>
        </section>
    </main>
    <script>
        document.addEventListener("DOMContentLoaded", function() {
            const weatherInfo = document.getElementById("weather-info");
            const newsInfo = document.getElementById("news-info");

            // Fetch weather data
            fetch("https://api.openweathermap.org/data/2.5/weather?q=London&appid=YOUR_API_KEY")
                .then(response => response.json())
                .then(data => {
                    const weatherCard = createCard("Weather", `${data.weather[0].main}, ${data.main.temp}°C`);
                    weatherInfo.appendChild(weatherCard);
                })
                .catch(error => console.error("Error fetching weather data:", error));

            // Fetch news data
            fetch("https://newsapi.org/v2/top-headlines?country=us&apiKey=YOUR_API_KEY")
                .then(response => response.json())
                .then(data => {
                    data.articles.slice(0, 5).forEach(article => {
                        const newsCard = createCard(article.title, article.description);
                        newsInfo.appendChild(newsCard);
                    });
                })
                .catch(error => console.error("Error fetching news data:", error));

            function createCard(title, content) {
                const card = document.createElement("div");
                card.classList.add("card");
                card.innerHTML = `
                    <h3>${title}</h3>
                    <p>${content}</p>
                `;
                return card;
            }
        });
    </script>
</body>
</html>
Output
16. Virtual Reality Simulation
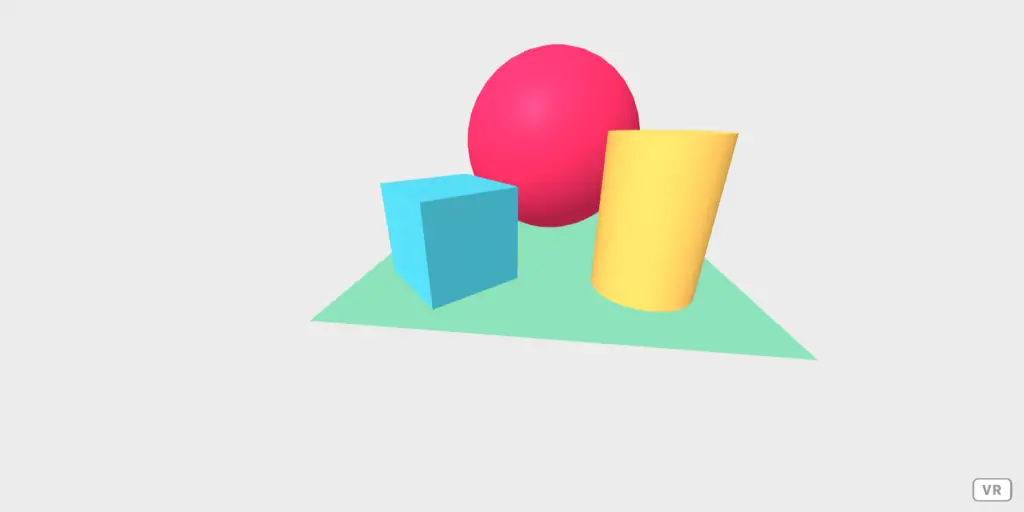
Create an engaging virtual reality experience. HTML structures your VR content, CSS styles it, and JavaScript with WebVR or A-Frame creates a world users can enter. Your project is a gateway to the future of digital immersion.
Virtual Reality Simulation Source Code
				<!DOCTYPE html>
<html lang="en">
<head>
    <meta charset="UTF-8">
    <meta name="viewport" content="width=device-width, initial-scale=1.0">
    <title>Virtual Reality Simulation</title>
    <script src="https://aframe.io/releases/1.2.0/aframe.min.js"></script>
</head>
<body>
    <a-scene>
        <a-box position="-1 0.5 -3" rotation="0 45 0" color="#4CC3D9"></a-box>
        <a-sphere position="0 1.25 -5" radius="1.25" color="#EF2D5E"></a-sphere>
        <a-cylinder position="1 0.75 -3" radius="0.5" height="1.5" color="#FFC65D"></a-cylinder>
        <a-plane position="0 0 -4" rotation="-90 0 0" width="4" height="4" color="#7BC8A4"></a-plane>
        <a-sky color="#ECECEC"></a-sky>
    </a-scene>
</body>
</html>
Output
17. Resume Builder
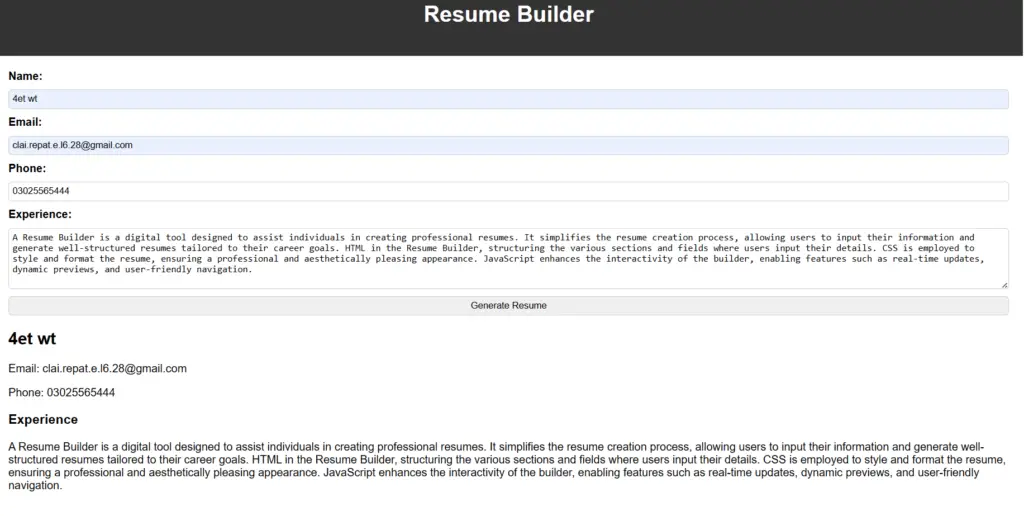
A Resume Builder is a digital tool designed to assist individuals in creating professional resumes. It simplifies the resume creation process, allowing users to input their information and generate well-structured resumes tailored to their career goals. HTML in the Resume Builder, structuring the various sections and fields where users input their details. CSS is employed to style and format the resume, ensuring a professional and aesthetically pleasing appearance. JavaScript enhances the interactivity of the builder, enabling features such as real-time updates, dynamic previews, and user-friendly navigation.
Resume Builder Source Code
				<!DOCTYPE html>
<html lang="en">
<head>
    <meta charset="UTF-8">
    <meta name="viewport" content="width=device-width, initial-scale=1.0">
    <title>Resume Builder</title>
    <style>
        body {
            font-family: Arial, sans-serif;
            margin: 0;
            padding: 0;
        }

        header {
            background-color: #333;
            color: white;
            padding: 20px;
            text-align: center;
        }

        main {
            padding: 20px;
        }

        form {
            display: flex;
            flex-direction: column;
            gap: 10px;
        }

        label {
            font-weight: bold;
        }

        input, textarea, button {
            padding: 5px;
            border-radius: 5px;
            border: 1px solid #ccc;
        }

        button {
            cursor: pointer;
        }

        #resume {
            margin-top: 20px;
        }
    </style>
</head>
<body>
    <header>
        <h1>Resume Builder</h1>
    </header>
    <main>
        <form id="resume-form">
            <label for="name">Name:</label>
            <input type="text" id="name" required>
            <label for="email">Email:</label>
            <input type="email" id="email" required>
            <label for="phone">Phone:</label>
            <input type="tel" id="phone" required>
            <label for="experience">Experience:</label>
            <textarea id="experience" rows="5"></textarea>
            <button type="submit">Generate Resume</button>
        </form>
        <div id="resume">
            <!-- Resume will be generated here -->
        </div>
    </main>
    <script>
        document.addEventListener("DOMContentLoaded", function() {
            const resumeForm = document.getElementById("resume-form");
            const resumeDiv = document.getElementById("resume");

            resumeForm.addEventListener("submit", function(event) {
                event.preventDefault();
                const name = document.getElementById("name").value;
                const email = document.getElementById("email").value;
                const phone = document.getElementById("phone").value;
                const experience = document.getElementById("experience").value;

                const resumeHTML = `
                    <h2>${name}</h2>
                    <p>Email: ${email}</p>
                    <p>Phone: ${phone}</p>
                    <h3>Experience</h3>
                    <p>${experience}</p>
                `;

                resumeDiv.innerHTML = resumeHTML;
            });
        });
    </script>
</body>
</html>
Output
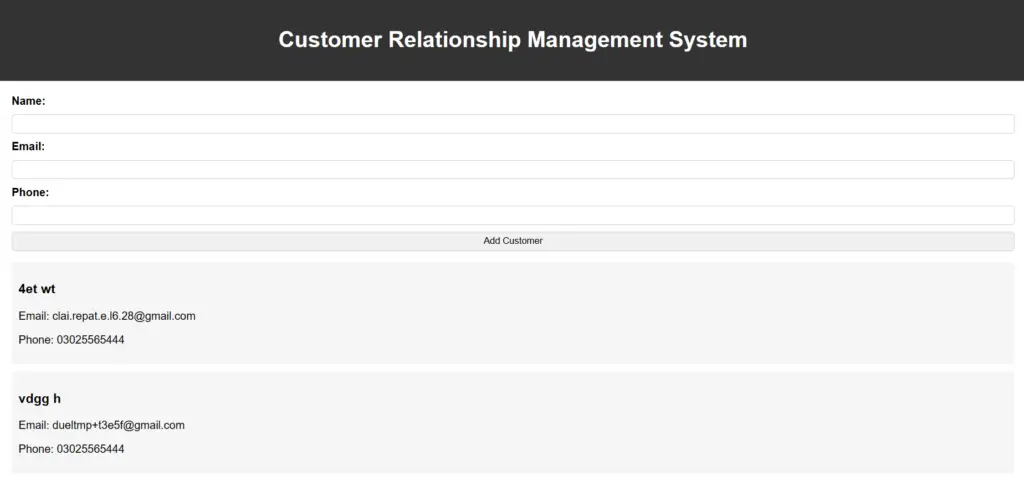
18. Customer Relationship Management System
A Customer Relationship Management System (CRM) is a valuable business tool to manage customer interactions. It helps organize, automate, and streamline aspects of customer relationships to enhance overall efficiency and satisfaction.
CRM Source Code
				<!DOCTYPE html>
<html lang="en">
<head>
    <meta charset="UTF-8">
    <meta name="viewport" content="width=device-width, initial-scale=1.0">
    <title>Customer Relationship Management System</title>

</head>
<style>
    body {
    font-family: Arial, sans-serif;
    margin: 0;
    padding: 0;
}

header {
    background-color: #333;
    color: white;
    padding: 20px;
    text-align: center;
}

main {
    padding: 20px;
}

form {
    display: flex;
    flex-direction: column;
    gap: 10px;
}

label {
    font-weight: bold;
}

input, button {
    padding: 5px;
    border-radius: 5px;
    border: 1px solid #ccc;
}

button {
    cursor: pointer;
}

#customer-list {
    list-style: none;
    padding: 0;
}

#customer-list li {
    background-color: #f5f5f5;
    padding: 10px;
    border-radius: 5px;
    margin-bottom: 10px;
}

</style>
<body>
    <header>
        <h1>Customer Relationship Management System</h1>
    </header>
    <main>
        <form id="customer-form">
            <label for="name">Name:</label>
            <input type="text" id="name" required>
            <label for="email">Email:</label>
            <input type="email" id="email" required>
            <label for="phone">Phone:</label>
            <input type="tel" id="phone" required>
            <button type="submit">Add Customer</button>
        </form>
        <ul id="customer-list">
            <!-- Customer details will be added here -->
        </ul>
    </main>
    <script>
document.addEventListener("DOMContentLoaded", function() {
    const customerForm = document.getElementById("customer-form");
    const customerList = document.getElementById("customer-list");

    customerForm.addEventListener("submit", function(event) {
        event.preventDefault();
        const name = document.getElementById("name").value;
        const email = document.getElementById("email").value;
        const phone = document.getElementById("phone").value;

        const customerItem = document.createElement("li");
        customerItem.innerHTML = `
            <h3>${name}</h3>
            <p>Email: ${email}</p>
            <p>Phone: ${phone}</p>
        `;
        customerList.appendChild(customerItem);

        // Clear form fields
        document.getElementById("name").value = "";
        document.getElementById("email").value = "";
        document.getElementById("phone").value = "";
    });
});


    </script>
</body>
</html>
Output
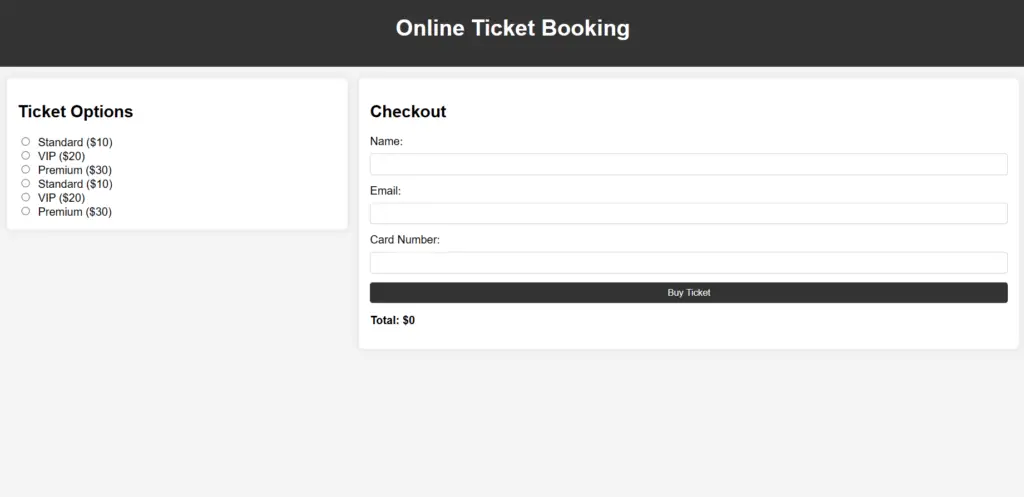
19. Online Ticket Booking Website
An Online Ticket Booking Website is a digital platform designed to simplify reserving tickets for various events, travel, or entertainment. It allows users to browse, select, and purchase tickets for their desired activities. This system used HTML, CSS, and JavaScript to enhance interactivity by enabling real-time seat availability updates, dynamic form validations, and responsive user interfaces.
Online ticket booking website Source Code
				<!DOCTYPE html>
<html lang="en">
<head>
    <meta charset="UTF-8">
    <meta name="viewport" content="width=device-width, initial-scale=1.0">
    <title>Online Ticket Booking</title>
    <style>
        body {
            font-family: Arial, sans-serif;
            margin: 0;
            padding: 0;
            background-color: #f4f4f4;
        }

        header {
            background-color: #333;
            color: white;
            padding: 1em;
            text-align: center;
        }

        main {
            padding: 1em;
            display: flex;
            justify-content: space-around;
            align-items: flex-start;
        }

        section {
            margin-bottom: 1em;
        }

        #tickets {
            flex: 1;
            margin-right: 1em;
            padding: 1em;
            background-color: white;
            border-radius: 8px;
            box-shadow: 0 0 10px rgba(0, 0, 0, 0.1);
        }

        #checkout {
            flex: 2;
            padding: 1em;
            background-color: white;
            border-radius: 8px;
            box-shadow: 0 0 10px rgba(0, 0, 0, 0.1);
        }

        form {
            display: flex;
            flex-direction: column;
        }

        label {
            margin-bottom: 0.5em;
        }

        input[type="text"],
        input[type="email"] {
            padding: 0.5em;
            margin-bottom: 1em;
            border: 1px solid #ccc;
            border-radius: 4px;
        }

        input[type="radio"] {
            margin-right: 0.5em;
        }

        button {
            padding: 0.5em 1em;
            background-color: #333;
            color: white;
            border: none;
            border-radius: 4px;
            cursor: pointer;
        }

        button:hover {
            background-color: #555;
        }

        p {
            margin-top: 1em;
            font-weight: bold;
        }
    </style>
</head>
<body>
    <header>
        <h1>Online Ticket Booking</h1>
    </header>
    <main>
        <section id="tickets">
            <h2>Ticket Options</h2>
            <div>
                <input type="radio" name="ticket" value="Standard" id="Standard">
                <label for="Standard">Standard ($10)</label>
            </div>
            <div>
                <input type="radio" name="ticket" value="VIP" id="VIP">
                <label for="VIP">VIP ($20)</label>
            </div>
            <div>
                <input type="radio" name="ticket" value="Premium" id="Premium">
                <label for="Premium">Premium ($30)</label>
            </div>
        </section>
        <section id="checkout">
            <h2>Checkout</h2>
            <form>
                <label for="name">Name:</label>
                <input type="text" id="name" name="name" required>
                <label for="email">Email:</label>
                <input type="email" id="email" name="email" required>
                <label for="card">Card Number:</label>
                <input type="text" id="card" name="card" required>
                <button type="submit">Buy Ticket</button>
            </form>
            <p>Total: $<span id="total">0</span></p>
        </section>
    </main>
    <script>
        const tickets = [
            { name: 'Standard', price: 10 },
            { name: 'VIP', price: 20 },
            { name: 'Premium', price: 30 }
        ];

        const ticketsSection = document.getElementById('tickets');
        const checkoutSection = document.getElementById('checkout');

        // Display ticket options
        tickets.forEach(ticket => {
            const ticketDiv = document.createElement('div');
            ticketDiv.innerHTML = `
                <input type="radio" name="ticket" value="${ticket.name}" id="${ticket.name}">
                <label for="${ticket.name}">${ticket.name} ($${ticket.price})</label>
            `;
            ticketsSection.appendChild(ticketDiv);
        });

        // Display checkout form when a ticket is selected
        ticketsSection.addEventListener('change', (event) => {
            const selectedTicket = event.target.value;
            const ticket = tickets.find(ticket => ticket.name === selectedTicket);

            checkoutSection.innerHTML = `
                <h2>Checkout</h2>
                <form>
                    <label for="name">Name:</label>
                    <input type="text" id="name" name="name" required>
                    <label for="email">Email:</label>
                    <input type="email" id="email" name="email" required>
                    <label for="card">Card Number:</label>
                    <input type="text" id="card" name="card" required>
                    <button type="submit">Buy Ticket</button>
                </form>
                <p>Total: $${ticket.price}</p>
            `;
            document.getElementById('total').innerText = ticket.price;
        });
    </script>
</body>
</html>
Output
20. Restaurant Management System
A Restaurant Management System is a digital solution designed to simplify and optimize various operations within a restaurant. It includes functionalities that enhance the efficiency of tasks such as order processing, inventory management, and customer interactions. It gives restaurant staff tools to manage reservations, track orders, and control inventory, improving efficiency and enhancing the dining experience.
Restaurant Management system source code
				<!DOCTYPE html>
<html lang="en">
<head>
    <meta charset="UTF-8">
    <meta name="viewport" content="width=device-width, initial-scale=1.0">
    <title>Restaurant Management System</title>
    <style>
        body {
            font-family: Arial, sans-serif;
            margin: 0;
            padding: 0;
        }

        header {
            background-color: #333;
            color: white;
            padding: 1em;
            text-align: center;
        }

        main {
            padding: 1em;
            display: flex;
            justify-content: space-around;
            align-items: flex-start;
        }

        section {
            margin-bottom: 1em;
        }

        #menu {
            flex: 1;
            margin-right: 1em;
            padding: 1em;
            background-color: white;
            border-radius: 8px;
            box-shadow: 0 0 10px rgba(0, 0, 0, 0.1);
        }

        #orders {
            flex: 2;
            padding: 1em;
            background-color: white;
            border-radius: 8px;
            box-shadow: 0 0 10px rgba(0, 0, 0, 0.1);
        }

        ul {
            list-style-type: none;
            padding: 0;
        }

        li {
            padding: 0.5em;
            border-bottom: 1px solid #ccc;
        }

        button {
            padding: 0.5em 1em;
            background-color: #333;
            color: white;
            border: none;
            border-radius: 4px;
            cursor: pointer;
        }

        button:hover {
            background-color: #555;
        }
    </style>
</head>
<body>
    <header>
        <h1>Restaurant Management System</h1>
    </header>
    <main>
        <section id="menu">
            <h2>Menu</h2>
            <ul>
                <li>
                    <span>Burger</span>
                    <button onclick="addToOrder('Burger', 10)">Add to Order</button>
                </li>
                <li>
                    <span>Pizza</span>
                    <button onclick="addToOrder('Pizza', 15)">Add to Order</button>
                </li>
                <li>
                    <span>Salad</span>
                    <button onclick="addToOrder('Salad', 8)">Add to Order</button>
                </li>
            </ul>
        </section>
        <section id="orders">
            <h2>Orders</h2>
            <ul>
                <!-- Orders will be added here -->
            </ul>
        </section>
    </main>
    <script>
        function addToOrder(name, price) {
            const orderItem = document.createElement('li');
            orderItem.innerHTML = `
                <span>${name}</span>
                <span>$${price}</span>
                <button onclick="removeFromOrder(this)">Remove</button>
            `;
            document.getElementById('orders').querySelector('ul').appendChild(orderItem);
        }

        function removeFromOrder(button) {
            button.parentElement.remove();
        }
    </script>
</body>
</html>
Output
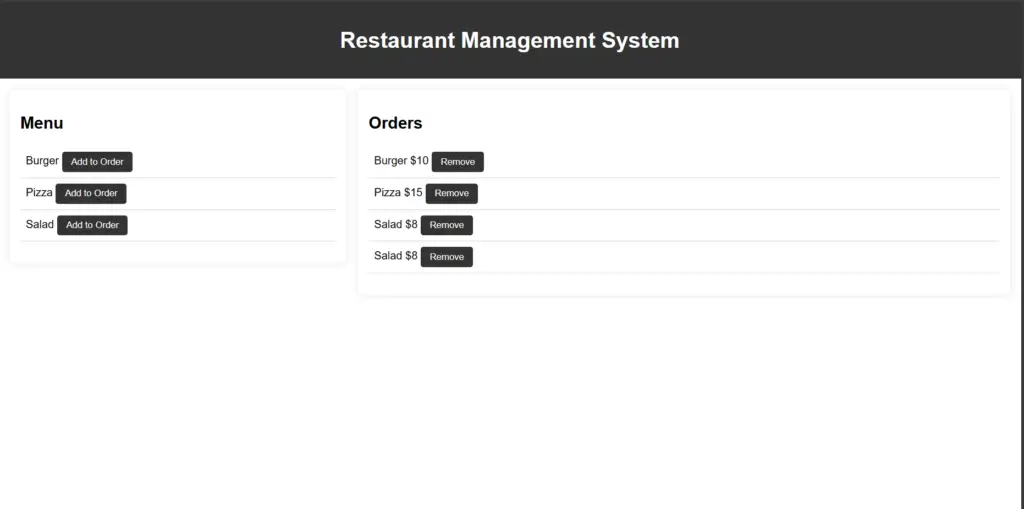
21. Stock Trading Simulator
The Stock Trading Simulator is an educational project designed to provide users with a risk-free environment to practice and enhance their stock trading skills. This simulated platform allows users to experience the stock market dynamics without real financial consequences. The system uses HTML, CSS, and JavaScript to create a user-friendly and interactive simulation interface.
Stock Trading simulator source code
				<!DOCTYPE html>
<html lang="en">
<head>
    <meta charset="UTF-8">
    <meta name="viewport" content="width=device-width, initial-scale=1.0">
    <title>Restaurant Management System</title>
    <style>
        body {
            font-family: Arial, sans-serif;
            margin: 0;
            padding: 0;
        }

        header {
            background-color: #333;
            color: white;
            padding: 1em;
            text-align: center;
        }

        main {
            padding: 1em;
            display: flex;
            justify-content: space-around;
            align-items: flex-start;
        }

        section {
            margin-bottom: 1em;
        }

        #menu {
            flex: 1;
            margin-right: 1em;
            padding: 1em;
            background-color: white;
            border-radius: 8px;
            box-shadow: 0 0 10px rgba(0, 0, 0, 0.1);
        }

        #orders {
            flex: 2;
            padding: 1em;
            background-color: white;
            border-radius: 8px;
            box-shadow: 0 0 10px rgba(0, 0, 0, 0.1);
        }

        ul {
            list-style-type: none;
            padding: 0;
        }

        li {
            padding: 0.5em;
            border-bottom: 1px solid #ccc;
        }

        button {
            padding: 0.5em 1em;
            background-color: #333;
            color: white;
            border: none;
            border-radius: 4px;
            cursor: pointer;
        }

        button:hover {
            background-color: #555;
        }
    </style>
</head>
<body>
    <header>
        <h1>Restaurant Management System</h1>
    </header>
    <main>
        <section id="menu">
            <h2>Menu</h2>
            <ul>
                <li>
                    <span>Burger</span>
                    <button onclick="addToOrder('Burger', 10)">Add to Order</button>
                </li>
                <li>
                    <span>Pizza</span>
                    <button onclick="addToOrder('Pizza', 15)">Add to Order</button>
                </li>
                <li>
                    <span>Salad</span>
                    <button onclick="addToOrder('Salad', 8)">Add to Order</button>
                </li>
            </ul>
        </section>
        <section id="orders">
            <h2>Orders</h2>
            <ul>
                <!-- Orders will be added here -->
            </ul>
        </section>
    </main>
    <script>
        function addToOrder(name, price) {
            const orderItem = document.createElement('li');
            orderItem.innerHTML = `
                <span>${name}</span>
                <span>$${price}</span>
                <button onclick="removeFromOrder(this)">Remove</button>
            `;
            document.getElementById('orders').querySelector('ul').appendChild(orderItem);
        }

        function removeFromOrder(button) {
            button.parentElement.remove();
        }
    </script>
</body>
</html>
Source Code
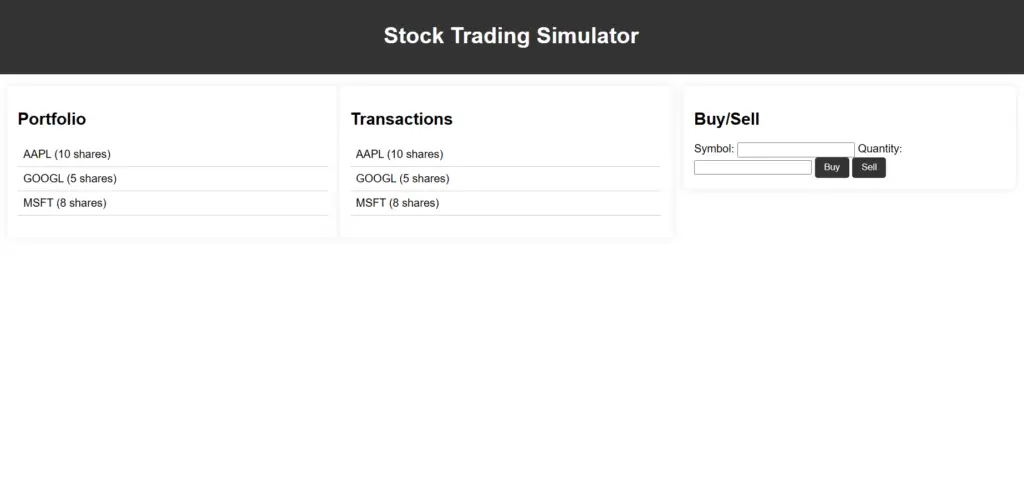
To Learn More
While basic projects can be completed with vanilla HTML, CSS, and JavaScript, exploring frameworks like React, Angular, or Vue.js can enhance your skills.
Absolutely! Feel free to choose projects based on your interests or focus on specific skill areas. It’s about your learning journey.
Start with the intermediate projects to build a strong foundation, then gradually move to advanced and expert-level projects as you gain confidence and skills.

Final Year Projects

Data Science Projects

Blockchain Projects
Python Projects

Cyber Security Projects

Web dev Projects

IOT Projects

C++ Projects
-
Where Do YouTubers Get Their Music?
-
Top 20 Machine Learning Project Ideas for Final Years with Code
-
Why Creators Choose YouTube: Exploring the Four Key Reasons
-
10 Advance Final Year Project Ideas with Source Code
-
10 Deep Learning Projects for Final Year in 2024
-
AI Music Composer project with source code
-
Realtime Object Detection
-
30 Final Year Project Ideas for IT Students
-
E Commerce sales forecasting using machine learning
-
Stock market Price Prediction using machine learning
-
c++ Projects for beginners
-
Python Projects For Final Year Students With Source Code
-
20 Exiciting Cyber Security Final Year Projects
-
10 Web Development Projects for beginners
-
Fake news detection using machine learning source code
-
Top 10 Best JAVA Final Year Projects
-
15 Exciting Blockchain Project Ideas with Source Code
-
C++ Projects with Source Code
-
Artificial Intelligence Projects For Final Year
-
Best 21 Projects Using HTML, CSS, Javascript With Source Code
-
Hand Gesture Recognition in python
-
Credit Card Fraud detection using machine learning
-
How to Download image in HTML
-
10 advanced JavaScript project ideas for experts in 2024
-
Hate Speech Detection Using Machine Learning
-
How to Host HTML website for free?
-
20 Advance IOT Projects For Final Year in 2024
-
Python Projects For Beginners with Source Code
-
Best Machine Learning Final Year Project
-
Data Science Projects with Source Code
-
Plant Disease Detection using Machine Learning
-
Ethical Hacking Projects
-
Top 7 Cybersecurity Final Year Projects in 2024
-
10 Exciting C++ projects with source code in 2024
-
Best 13 IOT Project Ideas For Final Year Students
-
Artificial Intelligence Projects for the Final Year
-
Top 13 IOT Projects With Source Code
-
portfolio website using javascript
-
Phishing website detection using Machine Learning with Source Code
-
10 Exciting Next.jS Project Ideas
-
17 Easy Blockchain Projects For Beginners
-
Fabric Defect Detection
-
Heart Disease Prediction Using Machine Learning
-
How to Change Color of Text in JavaScript
-
Diabetes Prediction Using Machine Learning
-
Wine Quality Prediction Using Machine Learning
-
10 Final Year Projects For Computer Science With Source Code
-
Car Price Prediction Using Machine Learning
-
Step-By-Step Complete Guide Of Freelance Visa Abu Dhabi In 2024
-
10 TypeScript Projects With Source Code
